This error mostly appears on Windows OS-running PCs, most notably Windows 7 and also Windows Server 2008. However, it also has the tendency to appear on any operating system. The error mostly appears whenever you are about to open the Event Viewer, Task Scheduler as well as Group Policy Editor. In this article, we are going to talk about How To Fix MMC Could Not Create The Snap-in Error. Let’s begin!
There are no universal fixes to the problem and you guys will, unfortunately, have to really follow via all of the methods. That was reported to be working via the users. Note that not all solutions are basically related to the same operating system and good luck!
Contents
- 1 What is MMC?
- 2 How To Fix MMC Could Not Create The Snap-in Error
What is MMC?
Well, the Microsoft Management Console (MMC) is basically an application that gives a graphical user interface (GUI) and also a programming framework as well. In which consoles (collections of administrative tools) we can also create, save, and open it as well.
MMC was originally released as part of the Windows 98 Resource Kit and is also included in all later versions. It uses a Multiple Document Interface (MDI) in an environment just the same as Microsoft’s Windows Explorer. MMC is considered to be actually a container for the actual operations, and is also known as a “tools host.” It does not, itself, give management, however, rather a framework in which management tools can operate.
Sometimes, there may also be a possibility of a scenario in which some snap-ins may not work properly. Especially, if the registry configuration of a snap-in is actually broken (note that Registry Editor is not a snap-in), the snap-in initialization would fail aswell. In this case, you guys are likely to get the following error message (a particular message in the case of Event Viewer): MMC could not really create the snap-in. The snap-in might not have been installed correctly.
How To Fix MMC Could Not Create The Snap-in Error
Before you guys move forward make sure to create a system restore point. Just in case something goes wrong, then you guys would be able to restore your system to this restore point. Now without even wasting any further time let’s see how you can fix MMC Could Not Create The Snap-in error through the following troubleshooting guide:
Run System File Checker
- Tap on Windows Key + X and then click on Command Prompt(Admin).
- Now type the following in the cmd and click on enter:
Sfc /scannow
- Then wait for the above process to finish and when done restart your PC.
- Now again open CMD and then type the following command one by one and click enter after each one:
Dism /Online /Cleanup-Image /CheckHealth
Dism /Online /Cleanup-Image /ScanHealth
Dism /Online /Cleanup-Image /RestoreHealth
- Let the DISM command run and just wait for it to finish.
- If the above command doesn’t really work then try on the below:
Dism /Image:C:\offline /Cleanup-Image /RestoreHealth /Source:c:\test\mount\windows
Dism /Online /Cleanup-Image /RestoreHealth /Source:c:\test\mount\windows /LimitAccess
Note: You can replace the C:\RepairSource\Windows along with the location of your repair source (Windows Installation or Recovery Disc).
- Just reboot your PC to save changes and see if you’re able to fix MMC Could Not Create The Snap-in error.
Registry Fix | Could Not Create The Snap-in
- Tap on Windows + R key simultaneously and type Regedit in the Run dialog box in order to open Registry Editor.
NOTE: Before manipulating the registry, you guys should make a backup of the Registry.
- Just inside Registry Editor navigates to the following key:
HKEY_LOCAL_MACHINE\SOFTWARE\Microsoft\MMC\SnapIns
- Well, inside SnapIns search for the error number specified in CLSID.
- Now after navigating to the following key, just right-tap on the FX:{b05566ad-fe9c-4363-be05-7a4cbb7cb510} and then select Export. This will basically let you back up the Registry key into a .reg file. Next, right-tap on the same key, and this time select Delete.
- At last, in the confirmation box, just choose Yes to delete the registry key. Close the Registry Editor and then reboot your system.
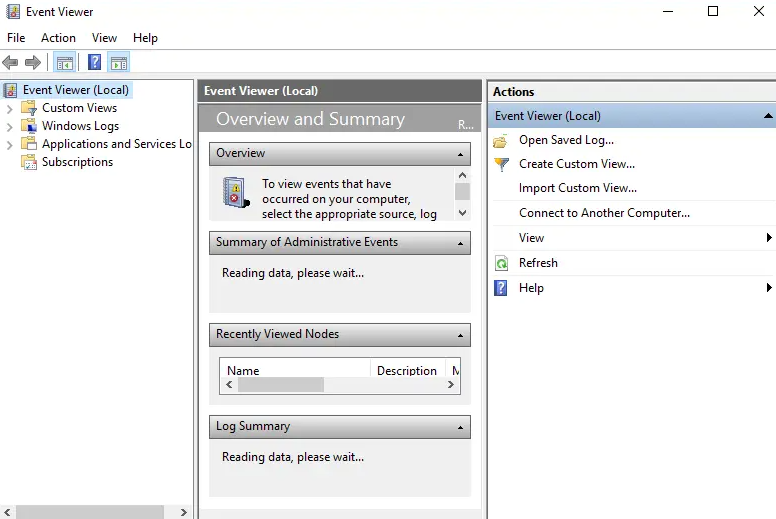
After restarting the machine, the Windows would automatically generate the required registry configuration for the Event Manager. And this basically solves the problem. So you guys can open Event Viewer and find it works as expected:
Turn on the Microsoft .net Framework
- You have to search for the control panel in Windows Search and then tap on Control Panel from the search result.
- From Control Panel, just click on “Uninstall a program” under Programs.
- Then choose “Turn Windows features on or off” from the left-hand menu.
- Then select “Microsoft .net Framework 3.5“. You guys have to expand each component and check the ones you want to turn on.
- Now restart the computer and check if you fix the issue is if not then head to the next step.
- You guys may run the system file checker tool once again.
The above method might Fix MMC Could Not Create The Snap-in error, however, if it doesn’t then follow the next method.
Install Remote Server Administration Tools (RSAT) on Windows 10
If nothing fixes the issue then you guys can use RSAT as an alternative to MMC on Windows 10. RSAT is a really useful tool that is developed via Microsoft that is used to manage Windows Server present in the remote location. Basically, there is an MMC snap-in “Active Directory Users and Computers” in the tool, that enables the user to do changes and manage the remote server as well. MMC snap-in is just like an add-on to the module. This tool is helpful to add new users and also reset the password to the organizational unit.
Visual C++ Issue | Could Not Create The Snap-in
Some people were on the phone with Microsoft regarding the problem and it actually appears that a series of steps, that we need to fix the problem. The problem, however, may also disappear even after a couple of steps. So just make sure you guys check regularly if the error still appears.
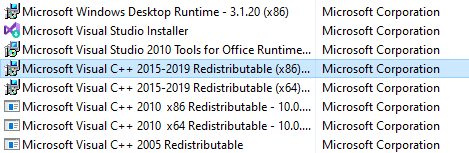
First of all, you guys will have to reinstall the Visual C++ Redistributable Package. Because it’s one of the main causes of this exact problem actually. Microsoft explained that the problem was caused through Visual C++ returning a bad pointer that triggers this issue as well.
steps
- Tap on the Start menu and open Control Panel via searching for it in the Start menu. Also, you guys can tap on the gear icon in order to open the Settings app if you are using Windows 10.
- In Control Panel, choose the View as Category option at the top right corner and then tap on Uninstall a Program under the Programs section at the bottom of the Control panel window.
- If you guys are using the Settings app on Windows 10, then tapping on Apps should immediately open a list of all installed programs on your PC.
- Just locate Microsoft Visual C++ Redistributable Package in Control Panel or Settings and tap on Uninstall. You might notice that there are many different versions. You will have to make note of them and repeat the uninstalling process for each one as well. Also, you may have to confirm some dialog boxes and follow the instructions that will appear along with the uninstallation wizard.
- Tap on Finish when the uninstaller completes the process and repeat the uninstalling process for all versions of the Visual C++ Package as well. Now, you will have to reinstall them by locating them here. Choose the version you guys want to download and select the download according to the architecture of your processor (32-bit or 64-bit).
- Now locate the file you just downloaded in the Windows folder, run it, and then follow the instructions on-screen. In order to install the Microsoft Visual C++ Redistributable Package as well. Repeat the same process for all versions you guys previously uninstalled and then check to see if the same error still appears.
Further
Well, if you notice that the problem still won’t go away even after you apply these fixes. Then you might have to update your computer to the latest version if you guys still haven’t done so. Windows 10 will automatically download and then install updates for you unless you refuse to install them as well. But, older versions of Windows won’t so follow the steps below in order to know for sure if your computer is fully updated.
- Hold the Windows Key and tap on X in order to open this special context menu. You can also right-tap on the Start menu. Select Windows Powershell (Admin).
- In the Powershell console, just type cmd and wait for Powershell in order to switch to the cmd-like environment.
- In the “cmd” console, you have to type in the following command and make sure you click on Enter afterward:
wuauclt.exe /updatenow - Now let this command run for at least an hour and then check back to see if any updates were found and/or installed successfully too.
Rename the mmc.exe File in System32
Simply renaming a file in System32 can also take care of the problem for you. However, note that this method does not work all the time and you guys should consider yourself extremely lucky if this one actually works for you. On the other hand, the method is really simple to try out and you can revert it easily if something goes wrong as well.
- Just navigate to the following location in your File Explorer that can be accessed from the toolbar at the bottom part of your screen. C >> Windows >> System32
- You have to locate and right-click on a file called mmc.exe and select the Rename option. Just try to rename it to ‘mmc.exe.old’. If a dialogue box appears prompting for administrator permissions, then you have to confirm it and try again.
- Now check to see if the problem is solved or not.
Conclusion
Alright, That was all Folks! I hope you guys like this article and also find it helpful to you. Give us your feedback on it. Also if you guys have further queries and issues related to this article. Then let us know in the comments section below. We will get back to you shortly.
Have a Great Day!


