We can outline text in Adobe Photoshop to make it stand out. It’s an instant and easy to learn way also if you’re a Photoshop beginner.
However, you want to be nice. Subtlety or nice is important as you can create amazing effects with just the right font combination, alternatively outlined text can look overdone.
In this guide, we’ll discuss how to outline text in Photoshop, and how to do it the right way.
Contents
Outline Text in Adobe Photoshop
This technique uses Layer Styles to make a stroke. It also enables the type layer to remain editable. Also, you can use the instructions below to add a stroke to any other object apart from type.
Step 1:
Choose the Type tool (Horizontal or Vertical) and then your text.
Step 2:
Right-tap on Type Layer and select Blending Options from the menu. Or head over to Layer > Layer Style > Stroke.
Step 3:
In the Layer Style dialog box, opt for Stroke at the bottom of the list of styles on the left.
Step 4:
The options at the bottom of the Stroke style provides you complete control over the appearance of the outline. Simply set the width or size to the required amount after using either the slider or input your own value.
Step 5:
Choose a Position for the stroke. The right position changes the appearance when text is combined with other layer elements. There are three choices.
- Inside. The stroke will be placed inside the edges of the selection.
- Center. The stroke will appear 10 pixels inside and out of the selection.
- Outside. The stroke will run along the outside edge of the selection.
Step 6:
Also, the Blend Mode controls how the colored stroke will interact with the colors or layers under the stroke. For example, if you place the text over a colorful image.
Step 7:
Also, use the Opacity slider to set the transparency degree for the stroke.
Step 8:
Strokes can also be filled with solid-color lines, colorful gradients, or patterned borders. Tap on the color tile to open the color picker. Also, pick your color. Tap OK.
Outline a Font in Adobe Photoshop
You can also take fancier fonts and make beautifully outlined fonts that look hollow inside. However, we used outline fonts everywhere from logos to signs, and so on so forth. You can also find free outline fonts online and then merge them and match them in your projects.

But also you can take any font and then make its insides disappear. Only, there is a border whole around the text but no fill. Simply layer it on its top to take the attention wherever you post it.
Come let’s take a look on how to outline any font in Adobe Photoshop:
Step 1:
Begin with a blank canvas. For instance, we have a black background.
Step 2:
Enter your text. Then, right-tap on the text layer and choose Blending Options.
Step 3:
Head over to Layer Style > Stroke > choose a position as Outside. Then set the Size slider to any amount you like (2-3 pixels is ideal) and Opacity to 100. Tap OK.
Step 4:
In the Layers tab, just lower the Opacity to 0%. That’s it.
It’s a simple process. You can also get creative to design your graphics with outlined fonts and various other effects. In the other section, let’s look at one example of the text outline effect.
Outline a Few Letters of a Photo in Photoshop
Head over to your photo in Photoshop. Then follow the steps given below:
Step 1:
Enter your text on top of the image and make it larger.
Step 2:
You can then make a copy of the text layer and name it “Transparent”.
Step 3:
Now, change one text layer into an outline and then keep the remaining with the fill as it is.
Step 4:
In our example, change the text layer you named “Transparent” and provide it the outlined text effect with the steps mention in the last section.
Step 5:
You can then, rasterize the filled layer with a right-tap on it. It changes the text layer into the usual bitmap image made of pixels.
Step 6:
Choose a part of this filled in the text you wish to hide with the rectangular marquee tool. Press Delete so that the chosen filled in the portion is erased and the lower text layer with the outline text is uncovered.
Step 7:
Then mix all visible layers or flatten the picture from the options in the Layer menu.
You can also view this simple text effect on web banners or social posts. Also, it takes a few minutes to create one for yourself.
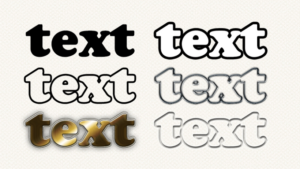
First Outlined Text Resemblance
There are lots of methods to outline text, but a basic trick is simple or easy. You can always merge the text with the Layer Styles to add effects. This procedure is flexible whenever you copy-paste any other text to replace the one you were working on. The Layer style stays intact, and the image will update with the latest text you just pasted.
Outlining enables you to highlight the boundaries of shapes, text, and also pictures images. You can also make custom shapes and merge them with text effects to make something stunning.
Conclusion:
Here’s all about “Outline Text in Adobe Photoshop”. Whatever the given methods you used, you can easily outline the text in Adobe photoshop. If you want to share any other thing regarding the article then let us know below. For further queries and questions let us know in the comment section below!
Also Read:


