Your PC system or Android phone might be encountering some of the issues related to security, and you would want to have those issues fixed actually. However, how can you do that? Backtracking is a way that can potentially help in diagnosing system errors and technical issues on your PC. It is pretty easy to install and then run backtrack on Windows, and you will soon learn how to backtrack your computer. In this article, we are going to talk about Install and Run Backtrack for Windows. Let’s begin!
If you want to install and run backtrack on your PC. Then read the whole article to know what backtracking means and the proper procedure for the same actually.
What does Backtrack mean?
Backtrack is a system powered via Linux distribution, made for security tools, that is used by security experts for penetration tests actually. It is basically an infiltration testing program that permits security professionals in order to assess vulnerabilities and perform evaluations in an entirely native environment as well. Backtrack features a vast collection of up to 300 open source security tools. Such as“Information Gathering,” Stress Testing,” “Reverse Engineering,” “Forensics,” “Reporting Tools,” as well as “Privilege Escalation,” “Maintaining Access,” and much more than that.
Contents
Install and Run Backtrack for Windows
It is just really simple to run and install backtrack. You guys can also use the following methods to run backtrack on your PC:
- With using VMware
- Using VirtualBox
- Using ISO (Image File)
Install and Run Backtrack On Windows Via VMWare
- First of all, all you have to do, is to create a new virtual machine. You can choose the “Typical” which is recommended.

- Next, you guys have to choose installer ISO (where you have to browse to the ISO file of Backtrack)
- Now you will be asked to choose a Guest operating system. Just simply select “Linux” and “Ubuntu” as version and tap on next,
- In the very next window, you guys will be asked to Name the virtual machine & Location as well.
- Then you have to specify the disk capacity (Recommended is 20GB)
- After all that in the very next window, you guys have to tap on “Finish”. Now you have to wait to enter in order to boot screen.
- Now you have to wait until the screen appears where you guys have to choose “Backtrack Text- Default Boot Text Mode”
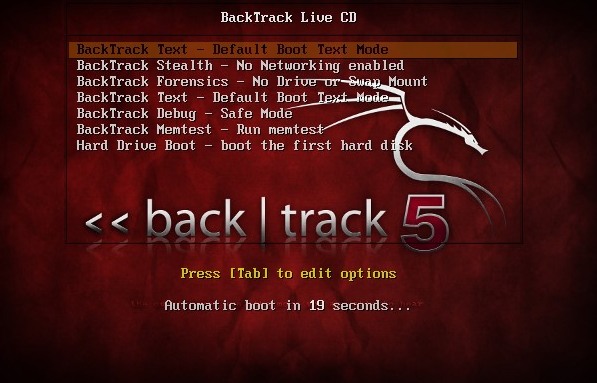
- The next window will actually look like this. You just have to type startx in order to get GUI and hit Enter.
- Now you guys will see a Desktop area where you will find an icon “Install BackTrack” you have to run it.
Then you have to go through some easy process such as setting up the clock and location as well as language. The procedure in order to install BackTrack is really easy you guys just have to follow the onscreen instructions.
Install and Run Backtrack On Windows via Virtual Box:
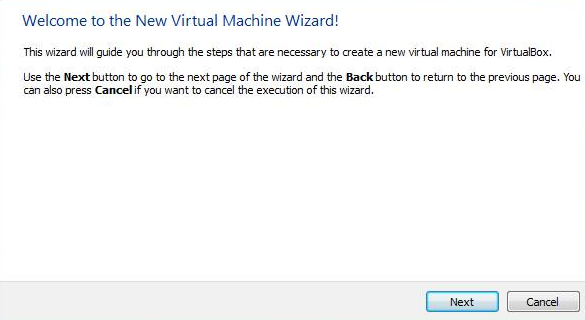
- In order to create a virtual machine, let us start the VirtualBox and press the ‘New‘ virtual machine button in the toolbar.
- After you tap on new, Enter any name for the Virtual Machine. Such as, “Backtrack” Then select the type of OS as Linux and Version as Other Linux. When you do that, then tap Next.
Note:
Well, my usual choice is in-between 512 MB to 800 MB. You guys can really change this to whatever you guys want however, I’ve run into ram issue at 512MB so I tend to up it actually.
- Just choose ‘Create a new hard disk’ and tap on Create. Then it asks you to select Hard drive file type. Choose the default VDI (Virtual Disk Image) and then tap Next.
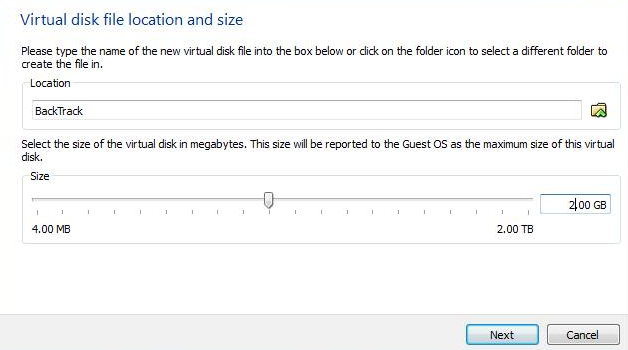
- Then after you guys have to choose ‘Dynamically allocated‘ and tap Next. And now comes the essential part. You have to choose the Size of Virtual Drive. I have given about 2GB of disk space for Virtual Machine actually. You guys can give more or less according to your need. After you tap Next, the Virtual Machine will then be created.
- Well, adding Backtrack Linux ISO to Virtual Machine. Now that you have created Virtual Machine, You gusy have to add an ISO or Image file of an OS. In order to do that Just press the Settings button. You have to choose Storage, and then select Empty. And finally, choose the disc icon on the rightmost side. Which would open up a drop down menu as well.
Further | backtrack for windows
- Now you have to select ‘Choose a virtual CD/DVD disk file‘ and browse to the directory where your ISO or Image file is saved. In this case, I will just browse and choose BT5. ISO image from my hard drive actually. And just tap OK. Now each and everything is set up. All you have to do is just tap ‘Start‘.
- After you guys click Start, The Virtual Machine then boots up. Then it loads up the OS (in this case – BackTrack 5). You guys might have to hit Enter so BackTrack starts booting now.
- That is just it now you able to install and run backtrack in windows. So in this way you guys successfully install and run backtrack 5 on your windows 7,8,10 as well.
Install and Run Backtrack via ISO (Image File)
This method is an easy alternative in order to install and run Backtrack on Windows Pc. Just follow the given steps to proceed further:
- The power ISO or demon tools software (Most probably, it will be already installed in your computer). If it is not installed, then just download ISO tools from the given link actually:
- Download the Backtrack ISO image file
- You will need a CD or DVD writer software and also a compatible Drive.
- Then insert a Blank DVD into Disk Drive.
- Just use the Power ISO file in order to burn Image File on Disk.
- Install backtrack on your PC after rebooting it via DVD.
Conclusion
Alright, That was all Folks! I hope you guys like this “backtrack for windows” article and also find it helpful to you. Give us your feedback on it. Also if you guys have further queries and issues related to this article. Then let us know in the comments section below. We will get back to you shortly.
Have a Great Day!
Also See: Hacking Tools For Mac, Windows, & Linux


