The Disk Cleanup tool has been around in Windows for many years. It offers a quick way to delete temporary, cache, and other non-essential files in order to help you free up some disk space. You can also use it to remove old versions of Windows after an upgrade to Windows 10. Disk Cleanup also has many hidden options that you can only access if you run it from the Command Prompt or a custom shortcut. In this article, we are going to talk about How to cleandsk in Windows 10 – Command Line Arguments. Let’s begin!
The built-in Windows tool, Disk Cleanup, that can be launched as cleanmgr.exe from the Run dialog, also supports a number of interesting command-line arguments that can be useful in many situations. Let’s review them and see how you can use them.
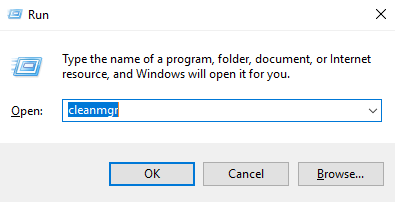
You can learn the switches available for Disk Cleanup through entering the following command in the Run dialog:
cleanmgr.exe /?
You can see the following screenshot:
The list that you can see as follows:
- /D DRIVELETTER
- /SAGESET:n
- /SAGERUN:n
- /TUNEUP:n
- /LOWDISK
- /VERYLOWDISK
- /SETUP
- /AUTOCLEAN
Here is what those switches actually mean.
Executes disk cleanup for a particular drive. The user should specify the drive letter without “:” as we show in the picture below:
cleanmgr.exe /D C
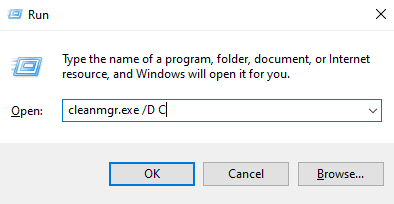
The command above will then launch disk cleanup for drive C.
You can also combine the /D argument with other switches of cleanmgr.exe.
Contents
cleanmgr.exe /SAGESET | cleandsk
The SAGESET key permits you to create a preset of selected checkboxes in cleanmgr.exe. When you do that, then you can launch the preset using the /SAGERUN option. You can see the syntax is as follows:
cleanmgr.exe /SAGESET:number
The command needs to execute elevated (as administrator).
Where the “number” can be any of the values from 0 to 65535. The options you choose during the SAGESET session will written to the Registry and stored there for further use. The command has to be executed elevated.
Use it as follows:
- First, open an elevated command prompt.
- Then type the following command
cleanmgr.exe /SAGESET:number
Suppose you use the number 112, such as:
- Tick the options you want to turn on for this preset as shown below:
- PressOK to save the preset under the number you entered in the Run dialog.
Since you started cleanmgr.exe /SAGESET:n elevated, then it will open directly in the “Clean up system files” mode.
Technically, every checkbox is shown in Disk Cleanup actually reflects the appropriate registry subkey under the following Registry branch:
HKEY_LOCAL_MACHINE\SOFTWARE\Microsoft\Windows\CurrentVersion\Explorer\VolumeCaches
Such as the Windows Upgrade Log Files subkey reflects the same option in the user interface of the application.
For each and every value you check, it will be marked under the StateFlagsNNNN DWORD value, where NNNN is a number that you passed to the SAGESET argument. I have the value StateFlags0112 there for my /SAGESET:112 command:
cleanmgr.exe /SAGERUN | cleandsk
The argument /SAGERUN permits the user to launch the preset configured earlier with the /SAGESET:n command. You can see the syntax is as follows:
cleanmgr.exe /SAGERUN:number
Use the same number that you used for the earlier/SAGESET:number command.
Combining with the previous example, then you should do the following.
- First, open an elevated command prompt.
- Then type the following command
cleanmgr.exe /SAGESET:number
Suppose you use the number 112:
- Tick the options that you want to be run for this preset as shown below:
- Tap OK to save the preset under number 112.
- Then type cleanmgr.exe /SAGERUN:112 in the Run dialog. It will then start to clean up using the preselected options automatically.
The cleanup process will be started immediately, also without any confirmation prompt. Disk Cleanup will also then close automatically.
If the /D argument is not specified for this command, then it will be applied to all drives.
The following commands are actually not documented. To discover them, I used Sysinternals Process Monitor and also logs of the cleanmgr utility. If they do not behave as described, please correct me in the comments.
cleanmgr.exe /TUNEUP | cleandsk
The command just has to described SAGESET functionality. In Windows 10, it also does exactly the same thing. Just like the SAGESET switch, it writes presets to the Registry. It can be used rather than SAGESET. You can see the syntax is as follows:
cleanmgr.exe /tuneup:112
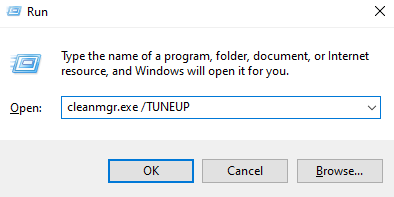
The command needs to execute elevated.
If you previously configured the number specified with the TUNEUP switch with SAGESET, then it will reflect the changes that you made:
This switch is not documented, so Microsoft can delete or change its behavior at any moment. I recommend you to use SAGESET rather.
cleanmgr.exe /LOWDISK | cleandsk
This switch is actually used when Windows notifies the user that he is running out of disk space on a drive. When you tap the notification, then Disk Cleanup opens with all checkboxes checked by default. You can also execute it from the Run dialog as follows:
cleanmgr.exe /LOWDISK
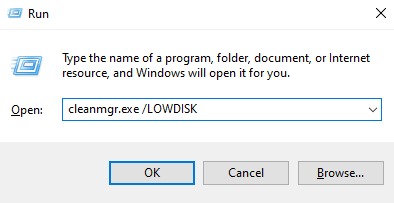
When you press the Enter key, then it will analyze the drive and show the familiar user interface, but with all checkboxes checked by default:
You can also run the command from an elevated command prompt to make it switch to the system files mode.
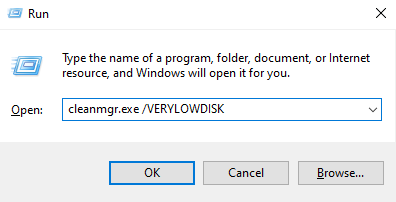
cleanmgr.exe /VERYLOWDISK | cleandsk
It is the same as the /LOWDISK disk switch, however, it will clean up all the files automatically. It won’t show you a confirmation but will show you a dialog in order to indicate how much free disk space you have now.
Syntax:
cleanmgr.exe /VERYLOWDISK
Run the command from the elevated command prompt to make it switch to the system files mode.
The setup actually switch analyzes the system files left from a previous Windows version. Such as, if you upgraded from Windows 7 to Windows 10, running this switch is useful. It also requires to execute from an elevated command prompt:
cleanmgr.exe /SETUP
The application will then calculate the space used by files from the previous Windows installation. It is just the same as the cleaning Previous Windows Installation files using the user interface of Disk Cleanup in regular mode. The application will analyze these following locations:
C:\$Windows.~BT\*
C:\$Windows.~LS\*
C:\$Windows.~WS\*
C:\ESD\Download\*
C:\ESD\Windows\*
C:\$WINDOWS.~Q\*
C:\$INPLACE.~TR\*
C:\Windows.old\*
C:\Windows\Panther
However, the application will not clean them up automatically. It also won’t show a user interface either. Rather, it will write two log files which you can inspect:
C:\Windows\System32\LogFiles\setupcln\setupact.log
C:\Windows\System32\LogFiles\setupcln\setuperr.log
It is the same as above, but the application will delete files from the previous Windows installation or the previous in-place upgrade automatically.
The following folders will delete:
C:\$Windows.~BT\*
C:\$Windows.~LS\*
C:\$Windows.~WS\*
C:\ESD\Download\*
C:\ESD\Windows\*
C:\$WINDOWS.~Q\*
C:\$INPLACE.~TR\*
C:\Windows.old\*
C:\Windows\Panther
The application will then write the results to the following log files:
C:\Windows\System32\LogFiles\setupcln\setupact.log
C:\Windows\System32\LogFiles\setupcln\setuperr.log
Also, it will not show any user interface.
You can see the syntax is as follows:
cleanmgr.exe /AUTOCLEAN
The command requires to execute elevated, e.g. you also need to launch it from an elevated command prompt instance.
Conclusion
Alright, That was all Folks! I hope you guys like this cleandsk article and also find it helpful to you. Give us your feedback on it. Also if you guys have further queries related to this article. Then let us know in the comments section below. We will get back to you shortly.
Have a Great Day!
Also See: Windows 10 reset permissions – NTFS reset Permission


