The Start menu is actually one of the most common components on Windows 10 that can break as well. Mostly, Windows Search and also the Taskbar might go down with it. These problems are really common, that Microsoft has actually a dedicated troubleshooting tool for the Start menu. In this article, we are going to talk about How to Fix Database Corrupt Errors in Windows 10. Let’s begin!
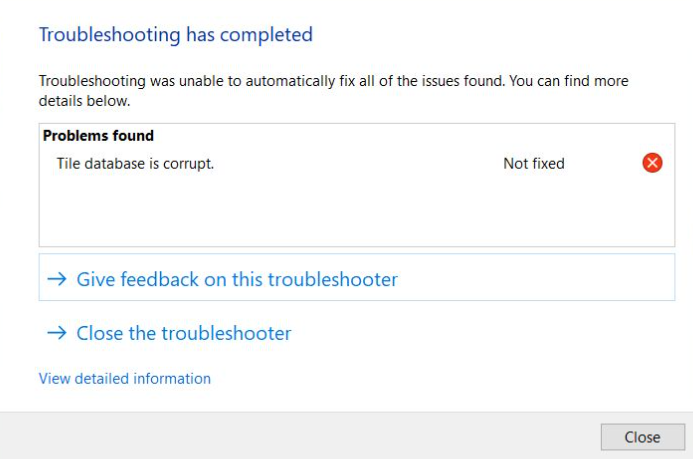
This tool does not always fix whatever problem it is that you are having along with the Start Menu. But, it will be able to identify one or more reasons that might be causing the problem. One such reason is that the ‘Tile database is corrupt’. This can actually lead to the Start menu not working. Or tile icons disappearing as well.
As you guys know, the Start Menu in Windows 10 is really a stable experience. But, there are times whenever it can encounter some issues as well just like getting corrupted. If your computer is going via the same problem, that you guys have come to the right place as this post will guide you on how you guys can fix the “Tile Data is corrupt” error.
Contents
Further
This kind of problem is actually really common among a lot of Windows 10 users. This kind of problem avoid the Start Menu from working properly and no amount of tapping the keyboard keys or also the mouse will resolve the issue. Fixing it is necessary since the Start Menu is needed for the operating system to function properly. And also even though there are a lot of ways to get around via the Start Menu, it can get quite problematic.
Even if you guys manage to open the Start Menu, the ability to tap on apps to open them is out of the question and you have to fix the problem. Worry not for the potential fixes provided in this post are not hard to follow as well. You guys can try to run the Start Menu troubleshooter or also run the DISM tool. You guys could also reset the folder for Tile Database or also re-register the Windows 10 Start Menu. For more details, just refer to each and every one of the options provided below.
How to Fix Database Corrupt Error in Windows 10
New Tile Database File
If the Start menu troubleshooter fails to fix the database, then you guys are going to have to go about doing it manually. There are actually two things that you can try; just copy a new database from a new user. Or you can copy it from a different machine. Obviously, you guys want to try to cop it from a new user before you go looking for an extra Windows 10 machine.
On your system, you have to create a brand new user and then log into it. Head to the following location.
C:\Users\newUserAccount\AppData\Local\TileDataLayer
Just copy the Database folder, and then paste it somewhere it’s pretty easy for you to access. Next, just return to your user account (the one along with the corrupt tile database). Now you have to navigate to the following location.
C:\Users\UserName\AppData\Local\TileDataLayer
There will also be another Database folder here as well. Just rename it something else e.g., Database. old and then just paste the Database folder that you copied from the other user account to the above location. Your Start menu will also be reset to default but, it will also start working again.
If the new user account’s database folder doesn’t work. Then just try to get this very same folder from a different Windows 10 system that has a fully functioning Start Menu.
Windows 10 Startup Repair
Windows 10 Startup repair might be able in order to fix the Start menu and then the corrupted tile database. You can also initiate Startup repair from the Settings app. Head to Update & Security>Recovery, and tap on Restart under Advanced Startup. On the Advanced Startup screen, you have to head to Troubleshoot>Advanced Options>Startup repair.
Just like that, if you have a Windows 10 install disk, then you can connect it and choose the Repair option.
Reset Windows 10
This is no one’s favorite repair option, however, if all else fails, resetting Windows 10 will actually fix the problem. If you don’t want to reset Windows 10, then check if a new user account actually has a functioning Start menu. And migrate your current user account to the new one as well.
Try to run the DISM tool
You guys can run the DISM tool as well in order to help fix the “Tile Database is corrupt” error. Using this built-in tool, you guys have many options such as the “/ScanHealth”, “/CheckHealth”, and also “/RestoreHealth” as well.
- First, you have to open the Command Prompt with admin privileges.
- Then type in the following commands and then make sure to click Enter right after you type each one of them:
- Dism /Online /Cleanup-Image /CheckHealth
- Dism /Online /Cleanup-Image /ScanHealth
- Dism(.)exe /Online /Cleanup-image /Restorehealth
- Do not just close the window if the process takes a while as it will probably take a few minutes in order to finish.
- When you do it, then just check if it was able to fix the corrupted Start Menu or not.
Try to re-register the Windows 10 Start Menu
- Press the Win + X and choose the “Windows PowerShell (Admin” option from the menu.
- After you open PowerShell and then execute this command: Get-AppXPackage -AllUsers |Foreach{Add-AppxPackage -DisableDevelopmentMode -Register “$($_.InstallLocation)AppXManifest.xml”}
- Now, wait until the command is executed and then see if it fixed the problem along with the Start Menu or not.
Besides the “Tile Database is corrupt” error, and if you have other system-related issues that have some fixing on your Windows 10 PC. There is actually a one-click solution known as Restore you can try to fix them. This program is a useful tool that could repair corrupted registries and also optimize your PC’s overall performance. Apart from that, it also cleans out your computer for any junk or also corrupted files.
That actually helps you to eliminate any unwanted files from your system. This is basically a solution that’s within your grasp along with just a click. It’s easy to use as it is user-friendly. For a complete set of instructions in downloading and then using it, refer to the steps below.
Steps
Now perform a full system scan using Restoro. If you want to do so, then follow the instructions below.
- Turn on your computer. If it’s already on, you have to reboot
- After that, the BIOS screen will also be displayed, but if Windows pops up rather, reboot your computer and try again as well. When you’re on the BIOS screen, then repeat pressing F8, via doing so the Advanced Option shows up.
- In order to navigate the Advanced Option use the arrow keys and then choose Safe Mode with Networking then hit
- Well, windows will now load the Safe Mode with Networking.
- Tap and hold both the R key and Windows key.
- If done correctly, then the Windows Run Box will show up.
- You have to type in the URL address in the Run dialog box and then tap Enter or click OK.
- After that, it will download the program. Now, wait for the download to finish and then open the launcher in order to install the program.
- When the installation process is completed, and run Restoro to perform a full system scan.
- After the scan is completed just tap on the “Fix, Clean & Optimize Now” button.
Conclusion
Alright, That was all Folks! I hope you guys like this article and also find it helpful to you. Give us your feedback on it. Also if you guys have further queries and issues related to this article. Then let us know in the comments section below. We will get back to you shortly.
Have a Great Day!


