
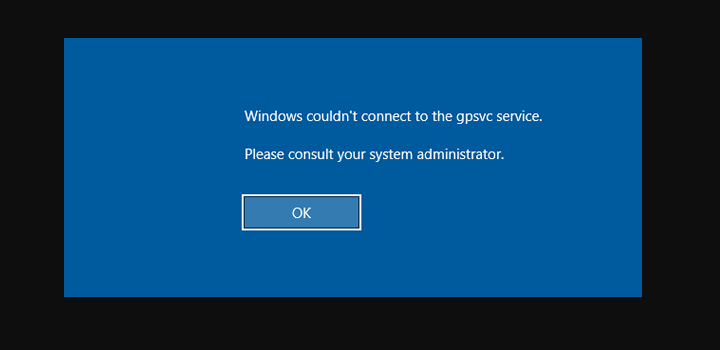
Are you looking for a solution to fix the ‘Windows couldn’t connect to the Group Policy Client’ error? Microsoft Windows offers support for various user accounts on one PC. Maybe you know that some accounts are the administrator and some are not. Well, there is generally no problem using administrator accounts, the other accounts probably face problems while logging into their account. But today in this article, you’ll learn about an error found in Windows 10. This error displays a message to the user saying “Windows couldn’t connect to the Group Policy Client” and asks you to contact the system administrator. But don’t fret you’ll learn how to fix it.
Also See: Windows 10 Issue ‘Windows Needs Your Current Credentials’ – How To Fix It
How To Fix Windows Couldn’t Connect To The Group Policy Client Service Error:
If you’re encountering this issue on your Windows 10 PC. You can’t access your user account. Due to this, resolving this error is very necessary as you can’t even use your computer. The error occurs because of many possible reasons in Windows 10. So, in this guide, we have added various possible solutions that can help you in getting rid of this error from Windows 10. So, without much ado go through all of the following solutions one by one to successfully resolve the error:
Fix 1: Turn On Group Policy Client Service Automatic Startup
The GPSVC or Group Policy Client is a Windows 10 service that logs into user accounts. And similarly lots of other services found in Windows. So the GPSVC has automatic startup turned on by default. But if for whatever reason, this option gets turned off, the Group Policy Client Service can’t start on when Windows 10 boots. As a result an error where the user can’t access the user accounts. In this situation you have to turn on automatic startup for GPSVC by following these steps:
- Initially head over to Services via Run in Windows 10 after hitting Windows Key + R on your keyboard. And in here, input services.msc and then hit enter which will open Services.
- Now, from the list of all Windows 10 services, search Group Policy Client Service.
- After this, double-tap on it which will open all its properties.
- Then use a drop-down menu located next to Startup type. Then keep in mind that Automatic is chosen and tap on OK to save your settings.
- At last, restart your PC which will resolve Windows couldn’t connect to the Group Policy Client service.
Fix 2: Turn Off Fast Startup in Windows 10 Through Control Panel
Windows 10 offers an essential feature known as Fast Startup which makes the booting process quite faster. It can do this by not starting all of the services of Windows 10 right on boot. But when it stops the Group Policy Client service from starting. Then you’ll start encountering an error after logging into user accounts. So, to successfully resolve Windows can’t connect to the Group Policy Client service error. You must try to turn off Fast Startup. Fast Startup can be turned off through the Control Panel:
- Head to Windows Search then open Control Panel on your Windows 10 PC.
- Then head over to Hardware and Sound and then open Power Options.
- Then tap on Choose what the power buttons do from the left side pane.
- Now, choose Change settings that are currently unavailable which will let you modify the settings located under the Window.
- At last, make sure that the Turn on fast start-up option is unmarked. You can then tap on Save changes to resolve the issue in Windows 10.
Also See: How to Detect Keylogger on Android – Tutorial
Fix 3: Run SFC and DISM via Command Prompt in Windows 10
When Windows 10 PC system files are corrupted because of some reason, you might face various errors. It means that you can also face the Group Policy Client Service error. The system files of your PC can get corrupted because of improper shutdown or Windows updates. If you want to successfully find and resolve these corrupted files, you can then execute the DISM or SFC commands in Windows 10. This can be done after using the Command Prompt in Windows 10:
- Initially, launch the Command Prompt as an administrator via Windows Search
- You can then input sfc /scannow followed by an enter which will execute an initial system file scan.
- When you’ve executed this command, then execute the following commands one by one similar to the previous command:
-
Dism /Online /Cleanup-Image /CheckHealth
-
Dism /Online /Cleanup-Image /ScanHealth
-
Dism /Online /Cleanup-Image /RestoreHealth
-
- After you’ve entered all of these commands in the Command prompt, reboot your PC which will resolve all of the corrupted system files in Windows 10
Fix 4: Windows Registry Editor Fix for Group Policy Client Service
Similar to all other services in Windows 10, the GPSVC has key values or registries. And after modifying these values, you can successfully resolve Windows couldn’t connect to the Group Policy Client Service error. So if you’re also facing this error in your Windows 10 PC, you can then move through the following instructions:
- Initially, head over to the Windows Registry Editor after adding regedit in Windows Run.\
- You can then move to HKEY_LOCAL_MACHINE\SYSTEM\CurrentControlSet\Services\gpsvc and make sure that ImagePath is in here.
- After that, head over to HKEY_LOCAL_MACHINE\SOFTWARE\Microsoft\Windows NT\CurrentVersion\Svchost. Then right-tap on SvcHost and then choose New>Multi-String Value.
- Then input GPSvcGroup in the Value name section and GPSvc in the Value data section and tap on OK.
- Now, right-tap on SvcHost and choose New>Key. Then specify its name GPSvcGroup which will create a new folder(key) under SvcHost.
- When this is done, right-tap on GPSvcGroup and then choose New>DWORD (32-bit) Value.
- At last, specify this value as AuthenticationCapabilities. Then double-tap on the newly created value to modify its value to 12320. You can then quit Registry Editor and reboot your computer to resolve Windows couldn’t connect to the Group Policy Client Service error in your Windows 10.
Conclusion:
I hope you successfully resolve the error ‘Windows couldn’t connect to the Group Policy Client Service’ on Windows 10 PC. In case you liked this guide, then share it with your friends. If you have any doubts regarding any of the methods, feel free to ask any questions or queries in the comments section below.
Also Read:


