If you guys are still on Windows 7, then you probably notice that wmpnetwk.exe is eating more of your system resources than any other service. If you were to believe Microsoft, this is a beta-only bug that was deleted from any of the public releases. However, as it turns out, users still encounter this issue along with fully-licensed Windows 7 public versions. In this article, we are going to talk about How to Fix wmpnetwk.exe High Memory. Let’s begin!
Well, this issue will only occur on Windows 7, along with users that have not turned off Windows Media Sharing.
Contents
What is wmpnetwk.exe?
It’s an internal system process that is turned off by default in ulterior Windows versions. The process is responsible to connect the built-in media player along with an external network. Although it should not be at all resource-demanding, some of the users have also reported a staggering 70% of resource consumption through this service alone.
Unless you guys stream music or videos over the internet with Windows Media Player, then this service is completely unnecessary actually. Turning off the wmpnetwk.exe will not affect your system in any way as well.
In any case, if you guys notice that your system is running increasingly slow. Then tap CTRL + Shift + ESC and press the Processes tab in order to bring it forward.
If you guys confirm that wmpnetwk.exe is the cause of your resource allocation problems. Then it’s time to act on it actually. If you guys don’t use Windows Media Center, we then recommend you that you turn off the wmpnetwk.exe once and for all. Well, disabling the wmpnetwk.exe process will not actually harm your system in any way.
But, if you use Windows Media Player to stream purposes occasionally. It might make more sense in order to apply a more delicate fix that will allow you to keep streaming on Windows Media Player.
Prevent wmpnetwk.exe from starting automatically(at startup) | wmpnetwk.exe high memory
This fix basically involves stopping the service and changing the startup type to Manual. After a restart, we will also change the startup to Automatic again. This will avoid wmpnetwk.exe to run by itself. Rather, it will only be accessed when needed (when you stream something in Windows Media Player). Here’s what you need to do:
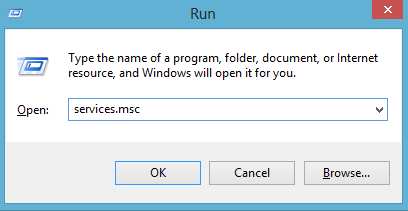
- Tap on Windows key + R and type services.msc.
- Now scroll down and then search for Windows Media Player Network Sharing Service. When you find it, right-click it and tap Stop.
- It might take some time until the service stops. You’ll know that the process is cut off when the Stop entry is grayed out actually. When that happens, then right-tap the service again and tap on Properties.
- When you’re in the Properties window, then tap on click the General tab and access the drop-down menu near Startup type. Set it to Manual, then tap Apply and restart your system as well.
- When your computer boots up again, you have to return to the Properties window. When you are there, choose the General tab and then change the startup type from Manual to Automatic (Not Automatic Delayed Start). Tap on Apply in order to confirm your selection.
The issue should now be resolved actually. Now, the wmpnetwk.exe process will only start when needed by Windows Media Player as well.
Permanently turn off the wmpnetwk.exe service | wmpnetwk.exe high memory
If you guys do not use Window Media Player, then there’s no reason why you’d want the wmpnetwk.exe service to start up again. In the event that you’re after a more decisive fix, turning off the wmpnetwk.exe service indefinitely is actually the best approach for you. Let’s see what you guys need to do:
Note: Turning off the wmpnetwk.exe service will not actually harm your system in any way.
- Tap on Windows key + R, type services.msc and tap Enter.
- Now scroll down and then you have to search for Windows Media Player Network Sharing Service. When you find it, right-click it and tap on Stop.
- When the Stop entry is grayed out, right-tap the service again and click on Properties.
- Press the General tab and access the drop-down menu near Startup type. Now set it to Disabled and then click on Apply.
How can you Fix wmpnetwk.exe High Memory?
Note: You guys will need this service will need if you want to share media or stream it over the network via Windows Media Player as well. Because I am a VLC Player geek, Windows Media Player does not appeal to me actually.
There are many folks who need this service, so let’s have a look at the quick fix. Stop the service, change the startup type to the manual, restart your computer, and then change the startup type to automatic as well. I have also elaborated on these steps below.
- First, tap on Start, type services.msc in Start Search, and tap Enter.
- Now you have to search for Windows Media Player Network Sharing Service from the list, right-tap on it, and click Stop.
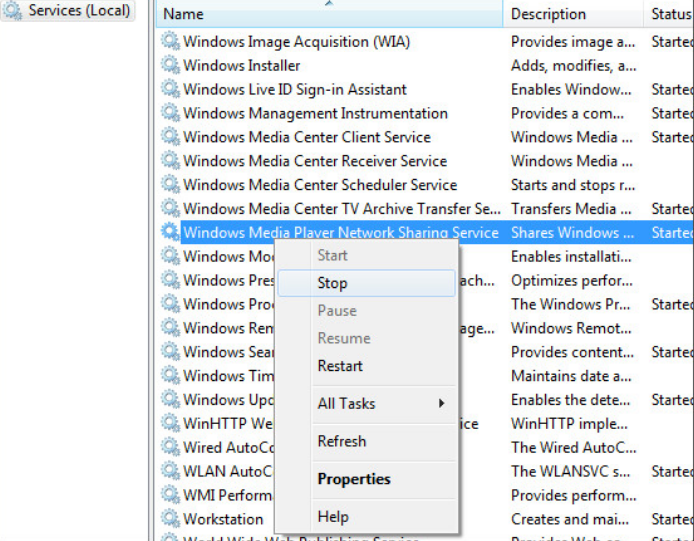
- It will take some time in order to stop the service. When you do that, right-click this service again and then choose Properties.
- Now change the Startup type to Manual and then restart the computer.
- When the computer restarts, then go back to the Properties once again and then change the Startup Type to Automatic as well. Well, the problem should be resolved now!
Important: This problem is affecting a really small number of users only and is not something Microsoft is planning in order to resolve in the upcoming service pack. If you have never used Windows Media Player and use 3rd party players, like, VLC. Then you can always turn off this service in order to save system resources.
Conclusion
Alright, That was all Folks! I hope you guys like this “wmpnetwk.exe high memory” article and also find it helpful to you. Give us your feedback on it. Also if you guys have further queries and issues related to this article. Then let us know in the comments section below. We will get back to you shortly.
Have a Great Day!


