Contents
Password Protect a USB Drive:
USB drives are cheap, reliable, portable, and quick. They are an ideal way to secure, store, share or back up files. However, USB drives are very vulnerable storage units that lack a lot of security breaches. For example, anyone can access the data stored on your USB drive if they can connect it with a computer or laptop. So, if your flash drive falls on some wrong hand. Then no doubt they can steal all of your data easily and you might become a victim of identity theft. So, in order to maintain the privacy and security of your identity and USB drive, we have to protect it with a password.
So let’s start with the solutions on how to password-protected a USB Drive on Windows.
Protect The Drive Using Bitlocker:
The most straightforward way to protect the driver is to password protect the entire device. That way, everything on the drive is secure. And even if you add new content to the drive at a later date, it will also protect that too. There are third-party encryption tools on the market that serve special needs. But for 99% of Windows 10 users, the built-in encryption tool is perfectly adequate. The Windows 10 tool is called BitLocker, and it works on all sorts of drives, not just removable USB drives.
Steps to protect your drive:
- Insert the USB drive into your computer.
- Navigate to This PC in Windows Explorer and right-click the USB drive.
- Select Turn BitLocker On.
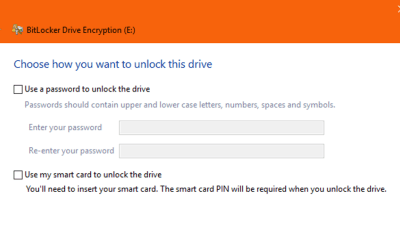
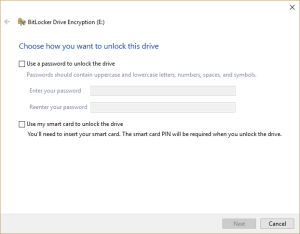
- Select ‘Use a password to unlock the drive’ and enter a password twice.
- Then select Next.
- Select where or how you want to receive your recovery key in the next window and select Next.
- After that, select ‘Encrypt entire drive’ and then Next.
- Select ‘Compatible mode’ in the choose which encryption mode screen and then hit Next.
- Then select Start encrypting.
The Explorer icon for the USB drive will now change to include a padlock. When you want to access the drive, double click it and you will be prompted for a password. Also be sure to use a password you can remember, or write it down somewhere safe. Because without your recovery key, that password, or a stack of supercomputers. You aren’t going to be able to decrypt the drive.
Protect the Drive Using Veracrypt:
If you want to protect your drive but don’t quite trust Microsoft, you can use Veracrypt. It is open-source and freely available. You can also make donations to support the project if you use VeraCrypt. VeraCrypt actually has more features than BitLocker but is still fairly easy to use to protect a USB drive. As of September 2018, VeraCrypt is on release version 1.23.
Steps:
- Launch the VeraCrypt app by typing “Veracrypt” in the search box, selecting the app, and hitting return.
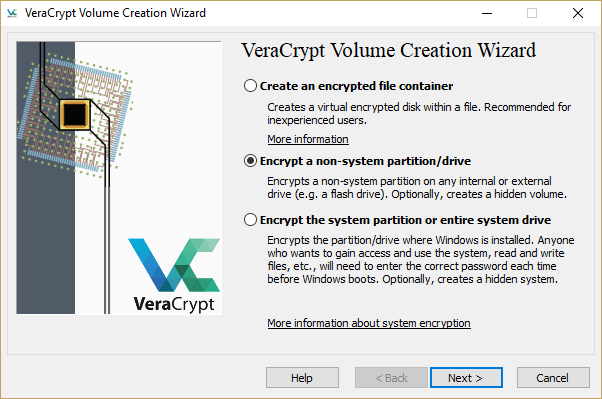
- Click on “Create Volume”, select “Encrypt a non-system partition/drive” and click “Next”.
- Select “Standard VeraCrypt volume” and click “Next”.
- Then click “Select Device” and select your USB drive from the list of devices that appears, then click “OK”, then click “Next”.
- IMPORTANT: Select “Encrypt partition in place”. If you select the other option and there is data on your drive, the data will be overridden and lost. Click “Next”. If you are protecting an empty drive, select “Create encrypted volume and format it” and click “Next”.
- Select the encryption method and hash algorithm you wish to use. Now, this is technical; you canb choose any of these and it will be fine unless the NSA is coming after your data. Click “Next”.
- After selecting it. Confirm the volume size and click “Next”.
- Enter and confirm your password, and click “Next”.
- Decide whether you will have large files on this partition or not, and select appropriately.
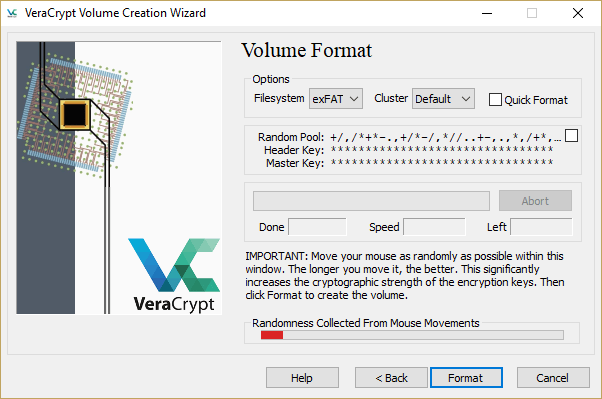
- This is a rather fun bit. Move the mouse randomly around in the window while VeraCrypt randomizes the cryptography. Your mouse movements apparently add randomness to the keys the program selects. Move them around until the bar is green, then click “Format”.
- Confirm the format command and wait. This process will take a few minutes to an hour or more. It depends on the size of your drive, the data already on it, and the speed of your computer.
- Mount the formatted drive in VeraCrypt (entering the correct password) and your drive will now be encrypted and functional.
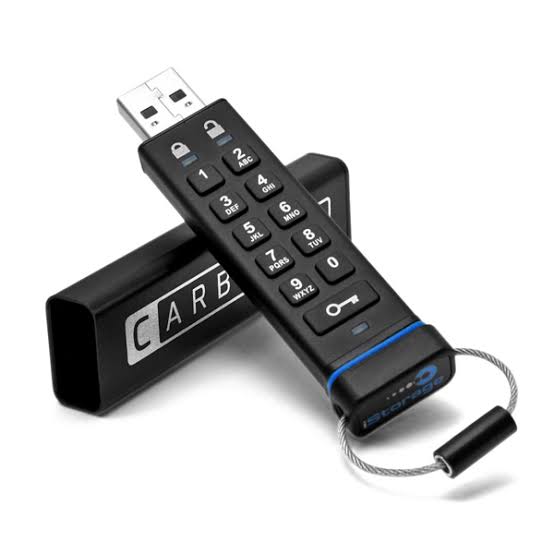
Buy Secure USB Drive:
If you don’t use Windows 10, or would rather buy a USB drive with hardware-based security, there are options available. The market offers a range of secure options for encrypted USB drives. Some will have physical keys on the casing for protection. While others will require a software key to unlock. The advantage of a secure USB drive is that it can include military-grade encryption. And the downside is that they are bulky and expensive. Where you would typically pay $10 for a normal 32GB USB drive, you can pay in excess of $130 for the same capacity secure drive.
It’s hard to justify the cost when you could buy a standard drive for a few dollars and then use Veracrypt or BitLocker to provide data security. VeraCrypt took over from TrueCrypt, an open-source encryption program that is very effective and easy to use. I would suggest using VeraCrypt if you don’t have the Pro or Enterprise version of Windows for encrypting the entire USB drive.
Password Protect Files on a USB Drive:
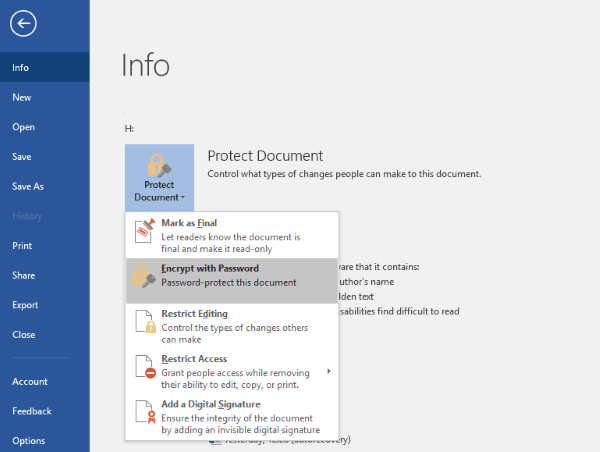
If the drive itself doesn’t need to be secured but a specific file or directory does. Then you can use Windows’ built-in password protection to secure the files or use a file compression tool to password-protect it. For example, you can password protect most Microsoft Office documents individually. Open the document, select File, Info and Protect Document from the menu options. Then select the option to Encrypt with Password. Add the password and then save it. From that point onward, every time you try to open the document you will be prompted for that password.
If you don’t have the option to use built-in encryption. Then you can use WinZip or WinRAR to compress the file and password protect it. Right-click the file and select Add to Archive or Send To Compressed folder. Select the option to Set a password or password-protect. Enter and confirm the password and compress the file. Every time you want to access the file, you will be prompted to enter the password before it is decompressed.
Those are three simple but very effective ways to password protect a USB drive in Windows. We hope you have liked our article and get some important information from it. have a Good Day!
Also See: What is the Microsoft Virtual WiFi Miniport Adapter?


