Recently I had Gmail Queued issue with my Gmail App for Android when sending out emails with attachment especially the PDF files. Although my internet speed was so high. Still, I was not able to send an email. And most of the time it gets stuck in the outbox folder with this error message. In this article, I’m going to tell you how to resolve this Queued and Failed Gmail issue in your Android. Let’s get it!
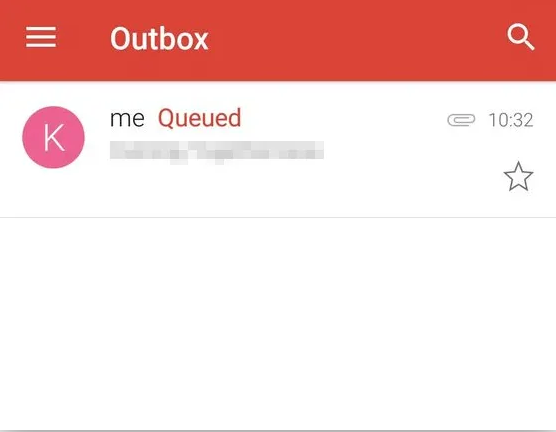
The email did not send and be in the Outbox for hours. And later it would change the status to “Failed”. Though my Outbox folder was completely empty, and there were no emails, it would still show as in the Queue error message.
I went forward and tried some troubleshooting steps to fix the Gmail Queued and failed error message. And hence sharing below the same. I believe this will somehow help you in resolving if you ever encountered it again.
Contents
- 1 What does Queued Mean in Gmail?
- 2 Before Starting it, Make sure
- 3 Clear App Cache and Data to resolve Queued and Failed Gmail issue
- 4 Enable and Disable Gmail Sync temporarily to resolve Gmail failed and queued issue
- 5 Remove Gmail Account and setup again
- 6 Decrease the days to sync option
- 7 Ensure to keep background data enabled
- 8 Have Enough Storage Space?
- 9 What worked for you in resolving Gmail Queued and Failed issue?
- 10 Conclusion
What does Queued Mean in Gmail?
The queued means Gmail is unable to send the outbox mail immediately. However, it is queued and will be attempted to send out later. There might be multiple reasons why it is in Gmail. However, I have listed down a couple of come reason for Gmail Queued and failed:
- Mailbox might be hitting the threshold limit every online application has a limitation so do the Gmail or Google mail. It can number of emails sent in a short span of time, the amount of data or file size, too many outgoing emails. It may be any limit that we can think of.
- The intermittent issue to connect Gmail servers yes, Gmail Queued and failed, this can happen. Since the issue is mostly with the Gmail app, there can be tonnes of network-related issues between the app and server.
- Running out of storage space in mobile Sending an email means occupying the storage space in the Gmail app. Hence, if you’re running out of space in your device, there are chances that the Gmail app is unable to adjust the additional data size and looking up for little extra storage space to send out an email. Until then it’s queued the outgoing email.
Before Starting it, Make sure
The first thing that you need to make sure that only the Gmail Application is having an issue. And you are able to send the emails with the attachment through the Gmail Inbox web interface. This will help in assessing whether Gmail is down or not. Then resolve the Gmail Queued and the failed issue.
In this case, if you face the same issue on the web as well then these tips won’t resolve the issue. This could be an issue from the Gmail side.
- You are running on the latest version of Gmail application and downloaded from Play Store only
- You are not sending the attachment over the Gmail send_limit of 50MB file size
- Have a stable network connection to your phone; either WiFi or mobile data
Clear App Cache and Data to resolve Queued and Failed Gmail issue
You can simply clear the Gmail application cache and stored data from your device Settings. Ensure that you have completely closed the Gmail application from the task manager.
- Open Phone Settings
- Then select Application Manager
- Swipe to “All” apps
- Choose Gmail from available apps
- Hit Clear cache and data button
This will delete all the temporary cached files on the Android device.
Enable and Disable Gmail Sync temporarily to resolve Gmail failed and queued issue
You should try to enable and disable the Sync within your Android device to ensure that functionality is working fine or not.
- Go to Settings option
- Select Accounts
- Choose Google Account
- Select the Email Account
- Uncheck Gmail and restart your phone
- After reboot, again enable the Checkbox
Try this multiple times in brief intervals in order to have hard sync in the Gmail application.
Remove Gmail Account and setup again
- Go to Settings
- Then select Accounts options from the menu
- Choose Google Account from the list and
- Select the Email Account within
- Tap to Remove association completely for a while
- Then clear cache and data from the Gmail app
- Reboot your phone and
- Reconfigure the Gmail Account in your phone
This will help in downloading the emails and set up again from scratch.
Decrease the days to sync option
Whenever you configure the phone with Gmail, it only retrieves the emails for a few days. As and when you start using the Gmail Application, it syncs with old emails as well. This will increase the cache and storage size for the application. It can help you to resolve your Failed and queued Gmail.
Hence, it is a good idea to limit the sync for maximum of 30 days. If there are any emails that are over 3days period, the Gmail application will automatically purge from the storage.
- Open your Gmail Application
- Go to Settings
- Select your account
- Tap on Days to sync
- Try limiting it to 30 days or even less
Ensure to keep background data enabled
By default, the background data is enabled. But, if you mistakenly disabled the background data. Then keep the option enabled.
- Go to Phone Settings
- Tap to Data Usage option
- Scroll down to “Gmail” App
- Make sure Restrict background data is not selected
Have Enough Storage Space?
One of the possibility to queue the email in the outbox is not having enough disk space on your device. Ensure to delete all the useless files and make enough room for new emails to send out.
Sending out an email will actually store the data in Gmail application storage. Hence it is important to have space in mobile to accommodate any incoming or outgoing emails.
What worked for you in resolving Gmail Queued and Failed issue?
When I removed my Gmail account from the Android device and later reconfigured it, it worked perfectly! I checked the Outbox folder to see if the mail with attachment still lying in the folder. But later found the mail got through the mailbox and available in the Sent folder. It worked for me.
Conclusion
If your issue with Gmail Queued and failed error got solved. Then please give us your feedback, how you were able to overcome the error. Also if you guys have further queries related to this article. Then let us know in the comments section below. We will get back to you shortly.
Have a Great Day!


