Do you wnat to take a backup of the iPhone to an external drive? We repeat it so much and some of us sick of hearing it: back up, back up, back up. It’s absolutely essential that you can take proper data recovery on your iOS devices so it’s safe in case of crash, loss, or theft.
After backing up a large-capacity iPad or iPhone creates a file that left somewhere. Also, those who depend on a MacBook or other Mac with quite small storage space might mind this.
You can also get around the issue after taking back up to iCloud. But the storage of iCloud is limited too, and you might not want to pay for the additional space. Which leaves us with the choice of external space.
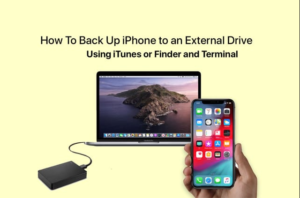
In this guide, we’ll display you how to copy an iTunes backup of an iPhone or iPad to the physical hard drive.
Remember that you’ll have your iPhone and the physical hard drive attached to the Mac. So manufacturers of single-port MacBooks might want to buy a USB hub.
Contents
Ctrl+C the Recovery to the external hard drive
Come let’s take a look:
Just hold an external drive with lots of space. Remember that it’s formatted perfectly and make a folder on the drive with an easy-to-remember name. ‘iPhone backup’ would be quite enough.
Remember iTunes is closed then head over to Finder. Hit Cmd + Shift + G, that opens Go To Folder. Then input the following text:
~/Library/Application Support/MobileSync/
Indicate the folder ‘Backup’ and press Cmd + C to copy it.
Now move back into the external folder. Then open the earlier created folder (‘iPhone backup’) and press Cmd + V to paste in the backup file. This process could take time as you’re copying across a large file.
Once the process ends, you can move back and then rename the file in Finder. Or else, you can delete or erase it.
Tell iTunes to back up to the hard drive in future
Our iPhone backup is quite safely saved on the external hard drive. But it is difficult to have to do this every time whenever a backup is created. Another step is to instruct iTunes to back up to the identical external location in the future – given the hard drive remains connected to the Mac.
Head over to Terminal. Input the following, then press Return. (Simply Replace ‘ExternalHD’ using the name of your external hard drive. A similar technique is applied to ‘iPhoneBackup’, if you’ve provided various name to the folder in your external hard drive.)
ln -s /Volumes/ExternalHD/iPhoneBackup/Backup/ ~/Library/Application\ Support/MobileSync/Backup
That’s all – from now on we know iTunes to save its iPhone recovery to the external hard drive and the required folder within. Remember that triggering an iTunes backup when the hard drive isn’t connected it will fail.
Before we move back and remove the backup file on the Mac. Simply check that it’s working properly. Quit Terminal and head back to Finder. Simply, find the folder ~/Library/Application Support/MobileSync/ – and you should now view a shortcut icon in the backup folder with an arrow.
Conclusion:
Here’s all about “Take Back-Up Of iPhone To External Drive”. If you are facing any issue then let us know. If you think that it is helpful then do let us know your suggestions in the comment section below. Do you know any other alternative method that you think we can’t cover in this guide?
Also Read:


