Setup PCSX2 BIOS: PCSX2 is the first and newly launched (years ago) PlayStation 2 emulator for PC. It’s still the best PS2 emulators available as it comes with plugins having high game compatibility. If you want to enjoy some old PlayStation 2 titles on your PC, our guide will tell you how to set up the PCSX2 BIOS and configure your controller so you can play your favorite PS2 games.
Contents
Setup PCSX2 BIOS
THE BIOS
Most emulators are complicated to install and set up, but not PCSX2. It has an installation wizard, and the process is quite simple as installing any other software on your PC. You can also download and install the emulator by clicking on this link. Here is what you have to do:
- You can navigate to your install folder and double-click on “pcsx2-1.4.0-setup.exe.”
- Then choose the components you want to install on the first pop-up screen. Leave everything like it is and hit “Next.”
- Agree with the terms and install Visual C++. Check the box and choose “Install.”
- The PCSX2 emulator is now installed, now it’s time to configure everything before running your first game.
CONFIGURATION AND SETUP PCSX2 BIOS
After the emulator installed, now it’s time to configure it for the first time to verify that it can run your favorite PS2 games properly. Here is how you do that:
- At first, locate the PCSX2 install folder in your Start menu program list. Run the program.
- You’ll start with the First Time Configuration screen. Press “Next.”
- Now review the available plug-ins included with the PCSX2 emulator and press “Next.”
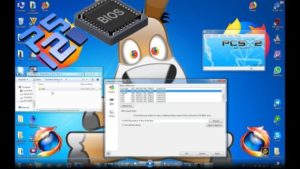
- BIOS screen pops up, choose “Open in Explorer” in the bottom right corner.
- A prompt will appears, saying that “This path does not exist. Create it?”
- Press “Create.”
- Now minimize the configuration window and make sure the exact path to the folder where your BIOS is installed. Now open the folder and drag the unpacked files from the installation into the folder.
- Maximize the “First Time Configuration” window. Choose the “Refresh list” to see the available regions. Here you see Japan, Europe, and USA BIOS files appear in the white box.
- Choose your region and press “Finish” to complete the setup.
- PCSX2 is now installed and ready to run.
KEYBOARD OR GAMEPAD SETUP
If you already used emulators, then you’ll come to know that they come with pre-configured keyboard keys you can’t change. But PCSX2 enables you to set up your keys to fit your preferences.
You’ll have to configure your keyboard or gamepad the first time you try to run the emulator. You can also play with the keyboard. But we recommend you to get a gamepad if you want to enjoy the games the way they are meant to be played. Here is what you have to do:
- Firstly, run the PCSX2 emulator.
- Navigate to “Config”, then choose “Controllers (PAD),” and finally “Plugin Settings.”
- Here you’ll see three tabs i.e: General, Pad 1, and Pad 2. Pads 1 and 2 are reserved for players 1 and 2.
- Choose Pad 1 to configure your controller.
- Here you’ll see a schematic having all the buttons you have to configure. These buttons represent those seen on the PlayStation 2 controller. Tap every button one at a time, and hit the corresponding button on your keyboard or controller. Repeat the process for every command.
- Press “OK” when you configure all of the buttons.
LOADING YOUR FIRST PS2 GAME
After setting up everything you need to play your favorite PS2 games, it’s time to load one. This emulator can run real PS2 games from DVDs.
Just put the game inside the DVD drive. Then open the emulator and navigate to “System,” and them “Boot CDVD.” However, it will put a lot of strain on your CPU, so we recommend that you gash each game and turn it into an ISO file instead.
TURNING YOUR PS2 GAME INTO AN ISO FILE

Follow the steps carefully to turn your PS2 game into an “ISO” file.
- At first, download a program called “ImgBurn.” While doing this disable your anti-virus because it could flag for adware. Don’t worry about this – ImgBurn is safe, widely used, and adware-free, so you just simply install it.
- Then open the program and choose “Create image file from disc.”
- Choose the “Source” drive and press the “Read” icon.
- ImgBurn then rips the game from your CD and provides you with the ISO file.
HOW TO LOAD A PS2 ISO FILE
Once you have created your ISO file, now load and run it. Here is what you have to do:
- At first, create a folder for your ISO games and place them there.
- Now run PSCX2 and hover your mouse over the “CDVD” tab. Then choose “ISO Selector,” and then “Browse.”
- Find the ISO of the game on your PC and tap “Open.” The emulator can run ISO, IMG, BIN, NRG, and MDF file types, as long as they are extracted from the RAR or ZIP file.
- Now navigate to “System,” and then “Boot CDVD (full).” Now wait for a few minutes for the game to load, and you are ready to start playing!
The important thing is the PCSX2 emulator will remember all of the games you played. You don’t need to manually add it.
ENJOY PLAYSTATION 2 GAMES ON YOUR PC
You can enjoy your most favorite PS2 games on your PC for free by installing the PCSX2 emulator. This setup is quite easy and you can find your old PS2 Games and gash them so that you can enjoy them again.
Conclusion:
Which PS2 games are your most favorite? Let us know in the comment section below!


