
Are you looking for a solution to fix ‘Windows Search Service Failed To Start’? If yes, then you are in the right place. Windows Search Service is an essential tool added into the Search app to help organize the extracted features of a collection of docs, and just deliver search results in an efficient way. During file processing, this service, called WSS, works after checking a set of docs, extracting essential information, and then organizing the pulled data to return the document’s properties in generated queries response.
But now users face an error. The error message is:
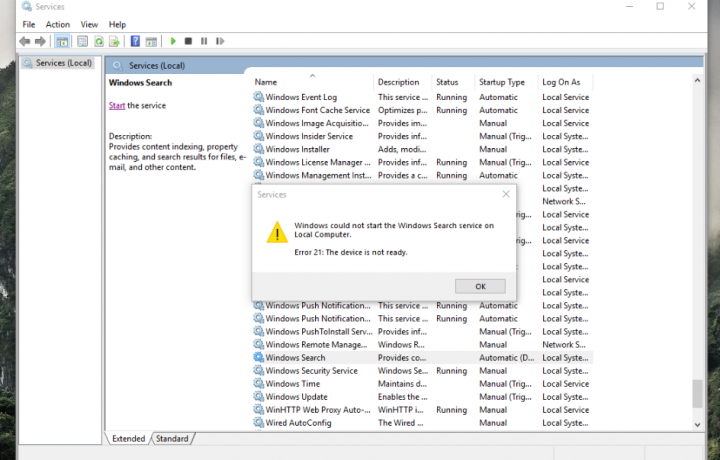
“Windows could not start the Windows Search service on Local Computer.”
In case if your WSS is stuck in the same quandary, head over to the troubleshooting techniques given below and cure the service instantly.
Contents
How To Fix Windows Search Service Failed To Start:
Follow the methods to fix the ‘Windows Search Service Failed To Start’ issue:
Fix 1: Use In-built Windows Search Troubleshooter
Well, Windows provides an inbuilt search troubleshooter to search issues with the Search tool and resolve them automatically. This can be accessed by following these instructions:
- Head over to the Start menu/screen
- Input Windows Search
- Then choose Find and fix problems with Windows Search
- Follow the steps to fix your specific circumstance
Certainly, the troubleshooter fails to fix errors regarding Search and Indexing. If that is your case, head over to the other solutions.
Fix 2: Redo Registry Changes
The error (Windows Search Service Failed To Start) mostly occurs to an undesirable alteration, either by a third-party app or manually, made in the Windows Registry. Well, it includes wiping out vital folder path references moving to the missing file issue. The simplest workaround to this issue is to manually edit the Registry, then rename the key given below and allow the system to recreate a new one:
- Simply launch the Run box (Windows + R keys)
- Then input regedit and hit Enter
- From the Registry Editor window expand HKEY_LOCAL_MACHINE from the left pane
- Tap the arrow located next to SOFTWARE
- Then expand Microsoft
- Expand Windows Search
- Move down to reach FileChangeClientConfigs and right-tap it
- Rename it to FileChangeClientConfigs.Bkp
- You can then exit Registry Editor and then restart your PC
- Head over to the services.msc from your Run box (Windows + R keys)
- Now locate Windows Search and right-tap it
- Start this service to verify the solution
After you fail to check FileChangeClientConfigs, Windows will create a new entry automatically in the registry. Just check if the indexing works. Alternatively, proceed with the troubleshooting to fix Windows Search Service Failed To Start issue.
Fix 3: Run System File Checker
The error (Windows Search Service Failed To Start) also occurs because of a missing system file. If you like to repair or search for this crucial item. You can then use the SFC tool from an elevated command prompt:
- Hit Windows + X keys to open the system menu (Windows 10 & 8)
- Then select Command Prompt (Admin)
- Windows 7 users can input cmd in the Start menu
- Right-tap cmd (Command Prompt) and then select Run as administrator from the menu
- In the elevated black window, input the following command and press Enter
- sfc /scannow
- Wait until the scan is complete (typically 1-2 hours, newer PC will run quickly)
- Reboot the system to resolve issues, if found
Then redo the problematic activities and check if the issue (Windows Search Service Failed To Start) is fixed. If not, head over to the last solution.
Fix 4: Rebuild Search Index
Well, rebuilding the search index loads the setup from the beginning and erase any potential problems upsetting the utility. If you wish to manually perform this task, here are the instructions:
- Head over to the Registry Editor
- The move to Widows Search key as demonstrated earlier, and highlight it
- Double-tap SetupCompletedSuccessfully value located in the right pane
- Then change its Value data from 1 to 0
- Tap OK
- Restart your PC
Note: In case, if SetupCompletedSuccessfully does not exist, right-tap the right pane. Then choose New or DWORD (32 bit) Value.
Try to again start the service. Your issue (Windows Search Service Failed To Start) is fixed after following this method.
If you still encountering the issue after all the solutions are practiced then wipe your registry as a final rejoinder. All you need to do is to use fraud registry cleaners to handle entries as a punishment your PC does not deserve. Rather than, it is recommended to operate the most highly acclaimed utilities to perform this task. One leading entity that fulfills all the criteria is Registry Recycler, which is totally free for Windows 10/8.1/8/7.
Conclusion:
So, these were some of the best methods to fix the “Windows Search Service Failed To Start” issue. If you know of any other alternative method to fix it then let us know in the comment section below.
Also Read:


