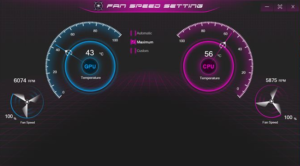
Do you want to set or change the custom fan speed on Windows 10? Your laptop and desktop computer both have built-in fans to keep your PC cool. If your PC overheats, it might damage your system hardware. In the event your PC overheats, it will shut down normally but can’t guarantee your hardware won’t be damaged.
So if you take your PC cooling into your own hands, then you can set a custom fan speed for your PC.
Contents
Fan Control On Windows 10
Before you try to set a custom fan speed for your PC. You must know that this isn’t something you should tinker with if you don’t know what you’re doing.
After setting the speed very low, or very high might damage your PC, also it causes it to use high power than it normally does.
How To Set Or Change Custom Fan Speed

CPU Fan Speed Control Via SpeedFan
The application for setting a custom fan speed on Windows 10 is SpeedFan. It’s an amazing app but in most of the cases your system’s fans probably not show up in the Fan tab.
All you need is to install or download the app. On the Readings tab, tap the Configure button. Then keep in mind that you notice every single warning the application provides you. From the Configure window, head over to the Fans tab. Your fans are listed there, and you can then try to set a custom speed for them.
Fan Speed Controller HWiNFO PC
Install or download HWiNFO. Choose the Sensors Only option, and execute the app. The app warns you that executing the app will impact your PC.
You might not view it for all systems. I got it for mine as it has an Embedded Controller sensor and it might also be the cause why SpeedFan doesn’t work for me. Besides, be mindful of your PC’s resources and how they’re being used.
When the app is executing, tap the fan button located at the bottom. As it’ll open the HWiNFO Fan Control window. It will list fans that are installed on your PC.
When the fan controls are inactive, it means you don’t have that specific fan installed.
If you want to set a custom fan speed input the maximum speed, then tap Set Manual. If you try to set a custom auto speed then tap on Custom Auto.
Choose the PCH sensor to get the temperature of your PC for triggering the fan speed and then input the temperature and the fan speed that the fan executes whenever your system reaches that temperature.
Tap Ok, to quit the window. From the main app window, tap the blue cross button located under the right to save the changes.
If your system begins experiencing unexpected shutdowns, then reset your fan to default.
Conclusion:
Did any of these given methods work for you? Or do you have other methods or tips for setting fan speed on Win 10? Let us know your thoughts in the comment section below!
Also Read:


