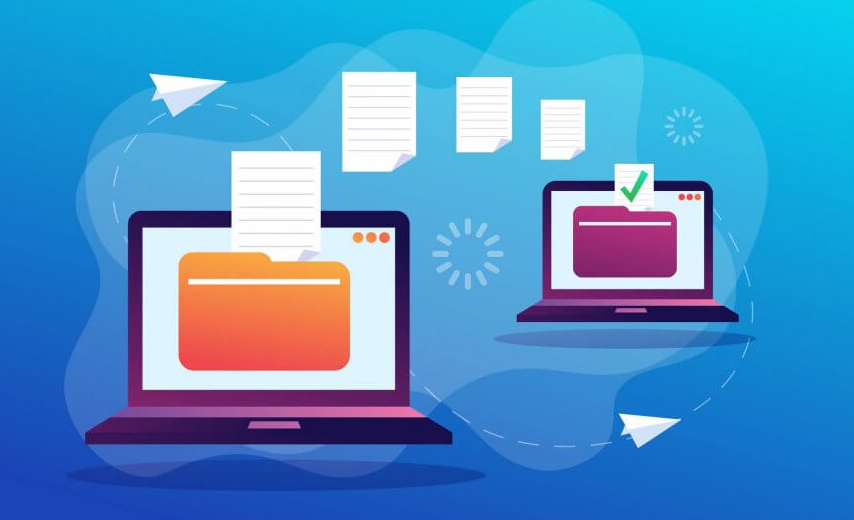
The HomeGroup feature of Windows allowed users in order to share files and resources along with other Windows PC over a small network, that say their home or office network. Along with HomeGroup, users could easily share documents, images, media, printers, as well. over a local network easily. But, Microsoft removed this feature from Windows 10 (Version 1803), that is why after this update. HomeGroup won’t really appear in File Explorer, Control Panel as well as the Troubleshoot screen from this version onwards. Users will also no longer be able to share their resources over a network via HomeGroup. However, some other Windows will give file and printer sharing options. In this article, we are going to talk about File Sharing Without Homegroup in Windows. Let’s begin!
Contents
File Sharing Without Homegroup in Windows
Use Onedrive
You guys can also share your OneDrive files saved on your computer. For this,
- Head to File Explorer.
- You have to move on to the OneDrive folder where the files you guys want to share are located.
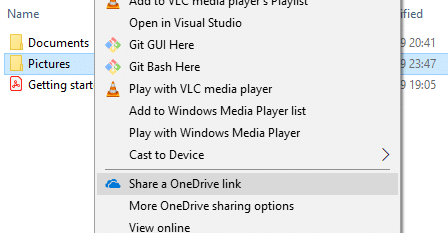
- Just right-click on the file that you need to share.
- Choose ‘Share a OneDrive link’.
- Now on doing this, a link to your file will now be created and placed on your clipboard.
- You guys can paste and send this link through your desired service such as email.
- Your file will now be shared.
- Also, you can also right-click on your file and choose ‘More OneDrive sharing options’ in order to configure expiration date, password, edit access, as well.
In order o share files over a local network, you guys can use this method. Before, sharing your files over a network, you will need to enable file and printer sharing options.
Enable Network Discovery And Sharing Options
In order to enable the sharing options,
- First, tap on the Start button on your taskbar.
- Tap on the gear icon to open Settings.
- Then click on ‘Network & Internet in the settings window.
- Tap on ‘Sharing options’.
- The advanced sharing settings window will then open.
- Now under the ‘Private’ section, tap on the radio button for ‘Turn on Network discovery.
- Make sure that the ‘Turn on automatic setup of networked connected devices’ checkbox is also checked as well.
- Also, enable the ‘Turn on file and printer sharing’ radio button as well.
- Furthermore, just expand the ‘All Networks’ block.
- You can optionally turn on ‘Public folder sharing’ if you guys want people on your home network to be able to access as well as modify your default public folders as well.
- You can also select to enable password-protected sharing if you guys need it.
- Tap on ‘Save changes.
- Network discovery will then be enabled on your computer.
- You have to follow the same steps on each computer on your local network.
- All the computers on your network will then appear in the ‘Network’ section of your File Explorer.
If you guys want to share files with someone only a few times and wouldn’t need a regular connection. Then you can use the Windows Share functionality. In order to share files using this method,
- Head to File Explorer.
- Then Locate the folder where the file you guys want to share is present.
- Choose one or more files you want to share. You can also share multiple files via pressing down the Ctrl key whenever selecting files.
- Now, tap on the ‘Share’ tab.
- Then tap on ‘Share’.
- Choose the app that you guys want to share your file through.
- Just follow any further instructions provided.
- Now your file will be shared.
You can also send the selected files as an email via clicking on the Email in the Share tab.
When you have configured these settings on all your desired computers. You can share your files through following the steps below:
- Head to File Explorer.
- Then head to the location of your file or folder that you guys want to share and right-click on it and then choose ‘Give access to’ from the menu. Tap on ‘Specific people…’
- In the ‘Network access’ window, choose the users that you need to share your folder with. If you choose a specific user. Then the user will have to give the username and password in order to access the resource or the user should be logged in to an account. Also, with the same credentials on their device. If you choose ‘everyone’ in the drop-down list, then your resource will also be shared with everyone without even having to enter credentials.
- Tap on the Add button after choosing the desired users.
- If you want to decide the access permissions, tap on the drop-down menu under the ‘Permission Level’ column. Select read if you want the user to only view the file and not modify it. Choose read/write if you want the user to be able to read and make changes to the shared file as well.
- Tap on Share.
- It will give you a link to the folder.
Sharing Printers | File Sharing Without Homegroup
Note that file and printer sharing options should be enabled on your PC. The steps for the same have been already discussed above as well.
In order o share along with other users on a local network,
- Just open settings via clicking on the gear icon in the Start menu. Tap on ‘Devices’
- Choose ‘Printers & scanners’ from the left pane. Choose the printer you want to share and tap on ‘Manage’.
- Tap on ‘Printer properties’. In the properties window, just switch to the Sharing tab.
- You have to check the ‘Share this printer checkbox.
- Type an identification name for this printer as well.
- Tap on Apply. Then tap on OK as well.
Conclusion
Alright, That was all Folks! I hope you guys like this article and also find it helpful to you. Give us your feedback on it. Also if you guys have further queries and issues related to this article. Then let us know in the comments section below. We will get back to you shortly.
Have a Great Day!