Added instructions for the “Enable OEM unlock” feature on Galaxy Note 5 and Galaxy S6 edge+ devices as well. However, it’s not applicable for all Samsung devices. In this article, we are going to talk about How to Flash Kernel Odin on Samsung Devices. Let’s begin!
Odin is basically PC software used internally at all Samsung service centers for updating or flashing Firmware to Samsung devices actually. This software was never meant to go public, however, thanks to the growing world of Samsung’s Galaxy devices. Odin is now used via general users for all sorts of things. Such as flashing stock Samsung ROMs, custom kernels, and custom recoveries like TWRP as well.
Below’s a step-by-step guide on how you can install a custom kernel (.tar) on any Samsung device via Odin 3.10.6 (latest version as of 16th July 2015).
If you guys are really new to this, then we recommend you to follow the instructions to the letter. And do not scare of it as well. It may seem like a big deal, however, Odin is the most friendly software to do this stuff for noobs. Now just follow the instructions below carefully.
Contents
How to Flash Kernel Odin on Samsung Devices
Step-By-Step Instructions
- Unzip the Odin 3.10.6 .zip file and run or open the Odin3 v3.10.6.exe file from the extracted files on your PC as well.
- Make sure you guys have downloaded a Odin flashable custom kernel .tar file that is compatible with your device.
- (If applicable) then turn on OEM unlock:
- Head to Settings » About phone » and click on “Build number” seven times in order to enable “Developer options”.
- Go back to the main Settings page, and then scroll to the bottom and choose “Developer options” from there.
- Now under Developer options, and look for the “Enable OEM unlock” checkbox or toggle and make sure you Check it or turn it ON as well.
Further | how to flash kernel odin
- Now boot your device into Download Mode:
- Then switch off your device.
- Tap and hold the “Home + Power + Volume down” buttons for a few seconds until you guys see a warning screen.
- Tap on the Volume Up on the warning screen in order to accept it and boot into Download mode.
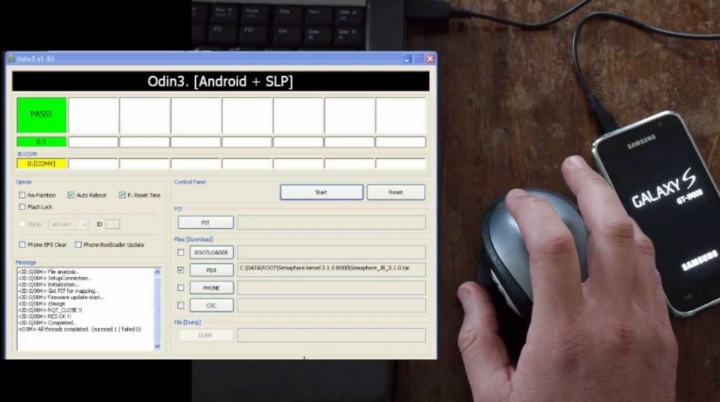
- When your device is in download mode, connect it to the PC along with a USB cable. The Odin window on the PC should detect the device and also show an“Added!!” message as well.
- Now tap on the AP tab on the Odin window and choose the custom kernel .tar file that you guys downloaded for your device.
└ Note: DON’T plays along with any other options on the screen. You guys only have to connect your device and then choose the Custom Kernel .tar file in the PA tab. - Press the Start button on Odin and wait for it to finish the process as well. When it has finished successfully, then you’ll also see a pass message on the Odin screen.
- Your device will automatically reboot whenever Odin is done flashing. You can then also disconnect your device as well.
Conclusion
Alright, That was all Folks! I hope you guys like this “how to flash kernel odin” article and also find it helpful to you. Give us your feedback on it. Also if you guys have further queries and issues related to this article. Then let us know in the comments section below. We will get back to you shortly.
Have a Great Day!


