Do you want to fix ‘Windows Stop Code Memory Management BSOD’? Windows 10 throws a dazzling array of error texts and stop codes when anything went wrong. When a BSOD error appears, you can then use the Windows stop code to resolve the issue.
At times, stop code problems for very particular errors. Also, you probably have to work through a huge range of Windows 10 solutions.
In this guide, we help you to fix the memory management errors, one resolve at a time.
What do you know about Windows Memory Management?
Memory management is essential to keep your OS marking perfectly. Memory management is the function that organizes your system memory. Properly working memory management, however, is essential to your system health.
When memory management went wrong, your system displaying BSODs at regular intervals. Here’s why:
Memory management can tracks every memory location on your PC, besides status. It manages or organizes the memory transition and processes b/w your RAM and physical memory while execution. Also, it decides how much memory to assign (and how much is available for allocation). After you close a program, it again assigns that memory to other processes or checks it available for use.
Also, memory management can’t release PC errors, just like the rest of your PC. And when it crashes, it takes your PC with it.
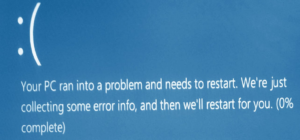
Windows Stop Code Memory Management BSOD
Just put, a memory management BSOD means there’s been a critical memory management error. There are many well-known reasons for memory management errors:
- Damaged RAM
- Problem with the new hardware, like a graphics card
- Damaged drivers
- Software problems, including corrupt system and operating system files
- Disk errors
At times, your system probably recovers after a reset. If you face a Memory Management BSOD, restart your PC and view if the error returns. If not, there might be a chance it was a one-off.
So how do you resolve it? Here are some things that you must try.
How To Fix Windows Stop Code Memory Management BSOD:
Update Windows 10
The first thing to do is to check the Windows 10 is fully up to date. Older system files cause unexpected errors. Checking for a pending update is an instant and easy method to check out if that is who is causing issues.
Press Windows key + I to open the Settings panel. Now, move to Update & Security, then check at the bottom of Windows Update for any pending updates. If you view an update, save confidential files, then hit Restart now. Your PC will reboot during the process.
Execute Windows 10 Memory Diagnostic Tool
You can also use the integrated Windows Memory Diagnostic utility to mark if your PC RAM is working properly. The Memory Diagnostic tool executes when a system reboots. Also, it checks your memory for errors and logs the scan to a text file for examination.
Write Windows Memory Diagnostic into your Start menu search bar and choose the best match. You have two choices: reboot quickly and execute the utility, or set the utility to execute after your reboot. When you are trying to reso0lve your memory management BSODs, save any confidential documents, and reboot your PC immediately. The Windows Memory Diagnostic executes after reboot.
The log file can’t apparent once you boot back into Windows 10. Hit Windows key + X and choose Event Viewer from the power menu. In the Event Viewer, choose Event Viewer (Local) > Windows Logs > System. Then, in the right-hand column choose Find and write MemoryDiagnostic into the box. Press Find Next. Your diagnostic results show under the window.
From there, you want to check any particular bugs the Windows Memory Diagnostic throws up.
Run MemTest86
Windows Memory Diagnostic can’t display any errors. But make sure the problems related to your PC RAM. If that’s the case, you can then use MemTest86 to perform an in-depth memory test.
MemTest86 is a free, standalone memory testing tool for x86 machines. You can boot MemTest86 from a USB flash drive or leave it to examine your PC RAM. Now, a MemTest86 RAM check takes time to complete it. Also, a single pass takes hours relying on the amount of RAM you have installed.
Update Your Drivers
Another quick and handy potential solution is to update your system drivers. The latest software or hardware might come with the new drivers, and your PC probably not got the message. Driver faults are quite common than in the days of computing. Especially when Windows 10 can handles driver updates, by and large.
Hit Windows Key + I to open the Settings panel, then choose Update & Security > View update history. You can also find any driver updates here. Now, write the device manager in the Start menu search bar and choose the best match. Move down the list and check for a bug symbol. If there is nothing, your driver status is not the source of the problem.
Also, you can use a third-party tool to update all of your PC drivers together. The first two issues—IOBit’s Driver Booster and Snappy Driver Installer—do exactly this.
GPU Drivers
A common theme in the Memory Management BSOD threads is that, at times, outdated or latest GPU drivers can be the reason for BSOD.
Execute CHKDSK
CHKDSK is a Windows PC tool that verifies the file system and with some settings, resolves problems as it runs. You also execute CHKDSK from the Command Prompt, and it has lots of amazing features.
Write command prompt in your Start menu search bar. Then right-tap the best match and choose Run as administrator. (On the other hand, hit Windows key + X, then choose Command Prompt (Admin) from the menu.)
Then, write chkdsk /r and hit Enter. The command will then scan your PC for errors and resolves problems with the way.
Execute SFC
Does memory management still become an issue? System File Check or SFC is another Windows system tool that examines missing and damage Windows system files. It sounds like CHKDSK, right? Well, SFC examines Windows system files, while CHKDSK scans your whole drive for errors.
But before executing the SFC command, it’s good to double-check that it is fully functional.
DISM stands for Deployment Image Servicing and Management. Also, DISM is a Windows utility with a huge range of functions. In this situation, the DISM Restorehealth command also ensures that our other solution will work properly. Follow the steps given below.
Step 1:
Write Command Prompt (Admin) in the Start menu search bar, then right-tap, and choose Run as administrator to open a fine Command Prompt.
Step 2:
Enter the following command and hit Enter: DISM /online /cleanup-image /restorehealth
Step 3:
Wait for the command to finish. The process can take a few minutes depending on your PC health. The process looks stuck at particular times, but wait for it to finish.
Step 4:
When the whole process completes, write or input sfc /scannow and hit Enter.
Check Physical Hardware
Physically check your machine hardware. There might be a chance your hardware unseated during the whole process. Just a small chance, but something worth monitoring!
Reset Windows 10
Certainly, nothing but a Windows 10 Reset will completely resolve your issue. Windows 10 Reset can replace your PC files with a full fresh set of files and clears lingering problems relating to the Memory Management error while keeping some of your confidential files intact.
Move to Settings > Update and Security > Recovery, then at the bottom Reset this PC pick or select Get started. Your PC restarts whenever you press the button. So keep in mind that you must take recovery to important files. Your PC will restart, then you might choose ‘Keep my files’ or ‘Remove everything’.
Conclusion:
Here’s all about “Windows Stop Code Memory Management BSOD”. Memory Management BSODs are complex to take care of. Many variables can become a reason for a Memory Management error, and that’s exactly why diagnosing a direct problem is sometimes cause an issue. However, one of the above solutions will bring your PC back from the brink so you can continue your work free of any BSOD for now.
If you want to share any other thing regarding the article then let us know below. For further queries and questions let us know in the comment section below!
Also Read:


