
Documents with small margins actually run the risk of printers trimming the initial and final words of every line. However, larger margins imply fewer words can accommodate in the same line causing the overall number of pages in a document to increase. To prevent any mishaps while printing and provide a good reading experience, documents with 1-inch margins are considered optimal. In this article, we are going to talk about How to Set 1 Inch Margins in Microsoft Word.
How to Set 1 Inch Margins in Microsoft Word
- Double-click on your word document in order to open it and consequently launch Word.
- Then switch to the Page Layout tab clicking on the same.
- Now expand the Margins selection menu in the Page Setup group.
- Microsoft Word has a number of predefined margins for many types of documents. Since a document along with a 1-inch margin on all sides is actually the preferred format across many places. It is also included as a preset too. Simply tap on Normal in order to set 1-inch margins.
- If you want to only have 1-inch margins on some sides of the document, tap on Custom Margins… at the end of the selection menu. A Page Setup dialogue box will come forth as well.
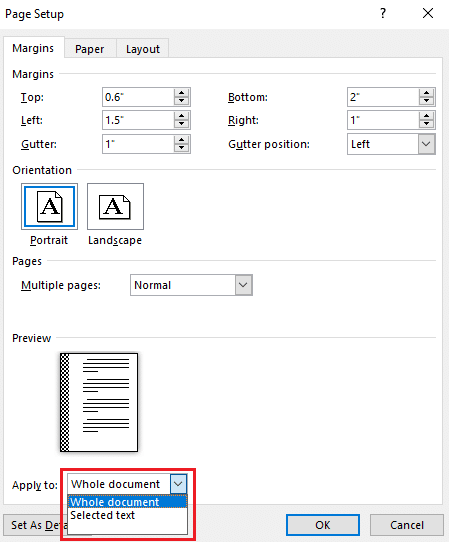
- On the Margins tab, individually set the top, bottom, left, and then right side margins according to your preference/requirement.
Further
If you want to print the document out and bind all the pages together either using a stapler or binder rings. Then you should also consider adding a gutter on one side. A gutter is an extra empty space in addition to the page margins to make sure the text does not tuck away from the reader after bidding.
-
- Tap on the up arrow button to add a little gutter space and choose the gutter position from the adjacent drop-down. If you guys set the gutter position to the top, you will have to change the document orientation to landscape.
- Also, using the Apply to option, choose if you would like all pages (entire document) to have the same margin and gutter space or only the selected text as well.
-
- Preview the document after setting the gutter margins and when you are happy with it. Tap on Ok to apply the margin and gutter settings.
If your workplace or school wants you to print/submit documents with custom margins and gutter size. Then consider setting them as the default for each new document you create. This way you won’t need to worry about changing the margin size before printing/mailing the document. Open the Page Setup dialogue box, then enter the margin and gutter size. Choose a gutter position, and tap on the Set as Default button at the bottom-left corner.
Conclusion
Alright, That was all Folks! I hope you guys like this article and also find it helpful to you. Give us your feedback on it. Also if you guys have further queries and issues related to this article. Then let us know in the comments section below. We will get back to you shortly.
Have a Great Day!