If you guys are using Smart DNS in order to bypass geo-restrictions placed via major services such as Netflix, Hulu, etc. Then you might face problems when you try to cast the show to your TV or other devices via Chromecast. In case you are thinking, the casting simply won’t work and Chromecast refuses to screencast actually. Well, in some cases, the same is true for another popular streaming device Roku. In this article, we are going to talk about Bypassing Chromecast DNS and Blocking Google DNS. Let’s begin!
In general, you can also bypass Netflix geo-restrictions on your smartphone and computer through services such as Smart DNS. However, if I try to cast the same to your TV via Chromecast, it wouldn’t work actually.
Contents
What’s actually the Problem?
Google basically forces Chromecast in order to use a Google DNS server. This way, no one can actually stream geo-restricted content on streaming services such as Hulu, HBO now and Netflix, etc. It’s good to keep their business partners happy.
Now, some of you guys may be thinking, what if I change the DNS server settings on my router?
Mostly, if you guys change the DNS settings on your router. Then each and every device connected to your router be it your PC, smartphone, or ps4, etc will automatically use that DNS server as well. But, in the case of Chromecast, because it has a Google DNS hardcoded DNS in it from the manufacturer. It will override any DNS that you program into your router actually.
The solution to That Problem
If you guys can find a way to block the Google DNS server on your router. It’ll force Chromecast to use whatever DNS server that’s available as well. Well, in this case, it’ll your smart DNS or any other custom DNS, that you guys want to set. And there are actually two ways you go about it.
One, you guys can create a new routing table on the router in order to block the google DNS server. But, this one is really hard to set up and may need custom firmware such as DD-WRT or Tomato
The second one is a lot easier, all you guys have to do is enter two values in your router’s interface to block Google DNS on your network actually.
With the second method is a lot more prudent and only takes a few seconds to set up as well.
Bypassing Chromecast DNS and Blocking Google DNS
We are now going to do this in just 2 simple steps
- Setup custom DNS on your router, this is actually the DNS server. That we basically want our Chromecast to use. For this instance, I will use Smart DNS Proxy, you guys can use whatever works for you.
- Add Static Routes in order to block Google DNS. In order to do is go to the “advanced routing option” on your router and then enter 2 values that will block google DNS on your network actually.
Setup custom DNS on your router
In this guide, I’ll now assume, that you guys already have custom DNS. That you guys want to use along with your Chromecast, and you know your way around a router actually. Also, you guys can always create a free trial account at Smart DNS Proxy and you’ll get 2 DNS servers actually.
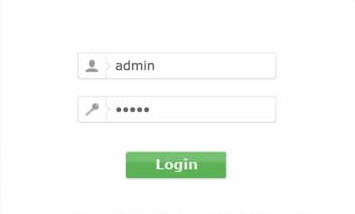
- Just type http://192.168.1.1 into the web browser to log into your router. Some routers admin panel may also load with http://192.168.0.1 or http://192.168.2.1. (Also when you are at it, make a mental note of your router’s IP address, we will need this later on actually
- Next, you need to type in the login credentials of your router web UI. The default credential is “admin” for both username and password actually.
- When you see the router’s web interface, then find the DNS section of your Router Panel (should be under DHCP or LAN option, etc). And then just change DNS as following Smart DNS Proxy IPs:
23.21.43.50
54.229.171.243
- Tap on Apply in order to save changes. After rebooting the router. All the devices connected to your router will basically use the custom DNS that you just entered.
Add Static Routes | Chromecast DNS
Now, we have to find a way to block Google DNS on your router. Just follow the steps,
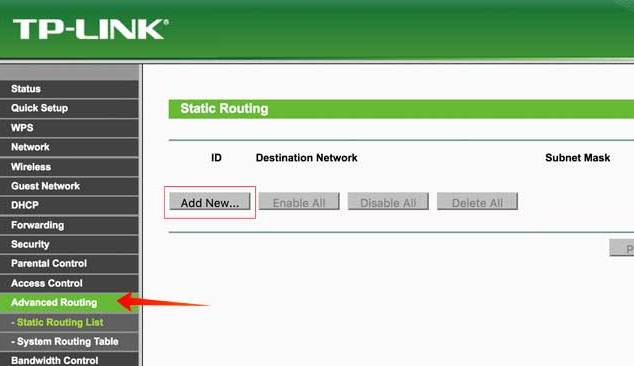
- Look for the option where you guys can set up a static route mostly you guys can find this option under Advanced Routing.
- Next, you guys have to create a new route. Just tap on the Static Routes option. Then you tap on Add and then enter the following to the Route List.
Destination IP Address: 8.8.8.8
IP Subnet Mask: 255.255.255.255
Gateway IP: Enter your Router IP address you noted in Part 1, should be something such as 192.168.1.1
- Now tap Apply and then Repeat Step 6 along with the following information:
Destination IP Address: 8.8.4.4
IP Subnet Mask: 255.255.255.255
Gateway IP: Enter your Router IP address that you noted before.
- Reboot your router and your PC, in order to flush the existing DNS that you might have on your network already. And that’s just it, you guys have successfully bypass Chromecast DNS now.
How can you Verify? | Chromecast DNS
Now, in order to verify if you guys have successfully blocked Google DNS on your Chromecast or not. Then just open up your cmd or terminal on macOS and ping google DNS that is ping 8.8.8.8.
If there’s no result, then you have successfully blocked Google DNS on your network. Now, when your Chromecast connects to your router, from now on your router will now re-route google DNS to Smart DNS Proxy IPs. That is set as the default DNS on your router actually.
Conclusion
Alright, That was all Folks! I hope you guys like this “Chromecast DNS” article and also find it helpful to you. Give us your feedback on it. Also if you guys have further queries and issues related to this article. Then let us know in the comments section below. We will get back to you shortly.
Have a Great Day!


