So after fixing exit code 13 and JVM not found are you guys still getting the exit code 1 error too? Then probably you have done something pretty wrong. First, check if you guys have the latest JDK(Java Development Kit) Downloaded? And what actually is the architecture of the PC on which you guys are running is that 64-bit or 32-bit? And is it actually the same as the JDK version? since it should be the same. Have you guys set the path in the environment variable such as shown in the fix JVM was not found an error? Do all of the above before even continuing. In this article, we are going to talk about How to Fix Java Was Started But Returned Exit Code 1. Let’s begin!

System. exit code actually terminates that is currently running Java virtual machine via initiating its shutdown sequence. This method never really returns normally and the argument serves as a status code as well.
How to Fix Java Was Started But Returned Exit Code 1
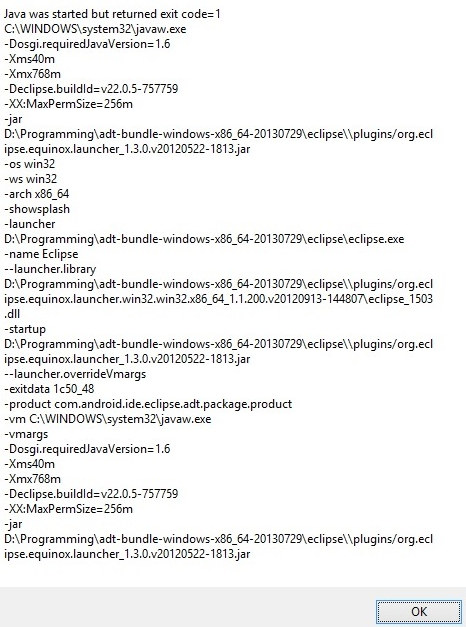
- Just head to the eclipse folder and right-tap on the eclipse.ini and then choose edit.
- Now, just add the following lines: [path of the JDK should be where you guys have installed jdk]
-XX:-UseCompressedOops
-vm
C:\Program Files\Java\jdk1.7.0_21\jre\bin\server\jvm.dll
Don’t just use the one in C:\Windows\System32
NOTE: Well, the above fix also fixes Eclipse error: Java was started but returned exit code=2
Important: Make sure, that the -vm option occurs before even the -vmargs command. As every command that basically occurs after -vmargs is actually passing directly to the JVM.
Well, almost everything after is pass directly to the JVM. If you guys don’t really know where the eclipse.ini file is: regularly it is actually in the folder of your eclipse.exe.
Also See: Minecraft Seed Converter – Convert into Java Seed
Common reason
Check which version of the operating system you guys are running. In order to check that, open windows explorer via pressing a Win+E key on your keyboard. Now on This PC (My Computer) that you guys found on the left side. Choose that and right-click on the mouse. In that pop-up menu just select the Properties option. When you guys tap on that properties option you will see the system properties window. In that window, just have a look at the “System Type” option.
In that System type, you guys will see 64-bit Operating System. That’s what we actually have to know. Now we know which version of the operating system we actually are running. After learning the operating system version, just make sure you guys downloaded the 64-bit version of Eclipse as well as a 64-bit version of Java software as well.
If you guys downloaded a 32-bit version (X86) of Java as well as eclipse any one of them. You guys will get that Exit code=13 error as well. Just please double-check the versions which you guys have downloaded. So, during installation, it won’t really show any error regarding the incompatible version. It will then install smoothly. In my case, I have installed the 32-bit version of Java so I’m getting that error as well.
Conclusion
Alright, That was all Folks! I hope you guys like this article and also find it helpful to you. Could you give us your feedback on it? Also if you guys have further queries and issues related to this article. Then let us know in the comments section below. We will get back to you shortly.


