
Kodi is basically an open-source media center app that provides you access to a world of content. Install add-ons in order to watch foreign movies, live sports broadcasts, Hollywood blockbusters, and so much more. Since the software is so extensible, but, it’s easy for children to stumble across things that you might not want them to see. Fortunately, Kodi actually makes it pretty easy to set up parental controls to protect them from harm. In this article, we are going to talk about How to Turn on Kodi Parental Control – Tutorial. Let’s begin!
Contents
- 1 Use a VPN | kodi parental control
Use a VPN | kodi parental control
Every time you stream a movie you’re sending unsecured data via your ISP. This can be used to track downloads, monitor your web surfing, or also even find your real location. Kodi users are actually under special scrutiny, as well, because many of the app’s add-ons can download pirated content. Using a VPN is the best way to protect yourself from these online dangers actually. VPNs create a private tunnel between you and the internet, keeping all of your activity and your location completely safe as well.
NordVPN
NordVPN is, according to our research, the best single online privacy solution that is currently available. We recommend it not only to address some of the issues along with Kodi but for anyone along with kids who use the Internet. The backbone of its offering is NordLynx (although many other protocols such as OpenVPN and IKEv2/IPSec are also available), an essentially unbreakable encryption method that doesn’t force you. In order to select between security and connection speeds.

Combined with a huge network of up to 5,800 servers in 59 countries. NordVPN permits you to reroute your traffic, hide your IP address, and block out any third-party attempts to gain entry into your connection through brute force. This stops cyber-criminals from launching a huge array of attacks targeting your IP. Government agencies from spying on you; and ISPs from throttling your Kodi traffic actually. What’s more, streaming services, links, and websites will be absolutely fooled into thinking you’re accessing their content libraries from whatever country you select to connect to–serving up geo-blocked content because if you were a local.
How to Turn on Kodi Parental Control – Tutorial
Whenever we say Kodi has a lot of features, we mean it! The software basically comes along with basic parental control out of the box, no add-on installations are required. It’s actually something of a hidden feature, but, and setting it up means taking the time to do a lot of customization. It’s worth it in the end as Kodi’s master lock feature lets you select exactly what your children can access, right down to the smallest of details as well.
How can you turn on master lock parental controls:
- Just open Kodi and go to the main menu.
- Tap on the gear icon in the top-left menu.
- Then click on “Interface Settings”
- Press the small gear at the bottom of the left menu until it says “Expert”
- Select the “Master lock” tab
- Choose the top option, “Master lock code and settings”
- Click on the top “Master lock” option. It starts off saying “Disabled”, however, we’re about to change that.
- A small menu will open letting you select lock options:
- Disabled
- Numeric password
- Gamepad button combo
- Full-text password
- A numeric password is the simplest, though you guys may want to go with a full text password if your children are older and might guess your number code.
- Tap on “numeric password”, then type in a lot of digits and hit “done”. There’s actually no limit to how many numbers you can use, however, four or five should be plenty.
- Now re-enter your numeric password at the prompt and click “done” again.
- Back in the master lock preferences, you’ll guys now be able to choose which features you want to protect with your password.
- Then toggle the features you want (see below for more detail), and then tap “OK”.
- Back at the main master lock screen, now just look for the “Ask for master lock code on startup” option. Toggle it to “on” if you guys want to avoid access to the entire Kodi program.
- Your settings are now automatically saved. Kodi will now prompt for a password whenever accessing the selected sections or also many other important menu items.
Master Lock Parental Controls
Well, setting master lock passwords isn’t just an all-or-nothing affair. Kodi also lets you select exactly which parts of the software are guarded via a code. You just want to keep kids out of the movies section? No problem. How about blocking access to new add-ons actually? Might as well! Just check below for a little more detail about each section. In order to change these options, follow the guide above.
- Lock music window – Avoids access to the music section of Kodi.
- Lock videos window – Stops access to all of Kodi’s videos, also including both movies and TV shows. You’ll probably want to turn this on actually!
- Lock pictures window – Keeps the images section locked along with a password.
- Lock programs & scripts windows – Stops anyone from via the more advanced sections of Kodi’s interface. Another good one to turn on actually.
- Lock file manager – It locks the file manager section, which stops anyone from adding new repository sources or browsing current ones actually.
- Lock settings – Avoid access to the settings panel. You can select between the different levels of settings, as well, each and everything from basic to advanced.
- Lock add-on manager – Keep unverified persons away from the add-ons screen actually. Avoids installing/uninstalling add-ons as well as accessing any sources provided through those extensions.
How to Set Protected Profile for Children
Master lock is great, however, let’s face it, you guys don’t want to be bothered with password screens every time you want to watch a movie. Fortunately, Kodi also lets you create multiple profiles and set particular ones to utilize the master lock feature. Just follow the steps below in order to create a separate profile your kids can use that’s fully protected via a password you set.
- First, open Kodi and go to the main menu.
- Press the gear icon in the top-left menu.
- Tap on “Profile Settings”
- Then click on “General”, then make sure “Show login screen on startup” is toggled on.
- Tap on “Profiles” followed by “Add profile…”
- Select a name for your profile.
- Click “ok” on the next menu as well.
- The edit profile window then pops open. Here you can set a number of options, also including profile picture and directory.
- Start via tapping on “Lock preferences”. If you don’t have master lock turned on, and you’ll be prompted to do so.
- Just set the individual profile to lock options. These are actually identical to the master lock options explained above. Select as many as you like, then click “ok”.
- Head to the media info option and toggle the option to the right via the arrows. This determines what movies and music the new profile can use as well. Select between sharing with the default profile or starting from scratch.
- Just do the same for the media sources option, now picking between sharing or separate data.
- Tap on “ok” and the edit profile window will close.
- You’ll be prompted along with the choice between starting with new settings or copying the default. Tap on “start fresh” for a blank profile.
- The new profile will also be set. Each and every time you start Kodi you’ll be prompted to select a profile and log in. You’ll stick along with your master profile; your kids will have the one guarded via parental control passwords only you guys will know.
What if You Forget Your Master Lock Password? | kodi parental control
Kodi provides you three chances in order to enter your password, and then it locks you out entirely. That’s excellent for avoiding brute force entries, however, not so great if you have butterfingers. Along with a little work you can actually reset your master lock password without even opening Kodi actually. This process will also reset some of your login options, however, it won’t affect your actual profiles.
The first thing you’ll guys want to do is locate Kodi’s profiles.xml file. This is also located in the userdata folder inside your installation directory. You can use your operating system’s search feature to find it, or also browse to the location via the paths below.
- Android – Android/data/org.xbmc.kodi/files/.kodi/userdata/
- iOS – /private/var/mobile/Library/Preferences/Kodi/userdata/
- Linux – ~/.kodi/userdata/
- Mac – /Users/[Your User Name]/Library/Application Support/Kodi/userdata/
- Windows – C:\Users\[Your User Name]\AppData\Roaming\Kodi\userdata\
- Windows (alternate) – Open the “Start” menu, type %APPDATA%\kodi\userdata , then press “Enter”
How can you remove the master lock password:
- Close Kodi on your local device.
- You can use the paths above to locate your profiles.xml file, then open it using a text editor.
- Near the top of the file you’ll also see a tag that looks like this: <lockaddonmanager>true</lockaddonmanager>
- Delete each and everything between the tags, which in this case is “true”. The tag will look like this whenever you’re finished: <lockaddonmanager></lockaddonmanager>
- Just do the same for the next eight entries. All of them start with “lock”. The section should look like this when you’re done actually:
<lockaddonmanager></lockaddonmanager>
<locksettings></locksettings>
<lockfiles></lockfiles>
<lockmusic></lockmusic>
<lockvideo></lockvideo>
<lockpictures></lockpictures>
<lockprograms></lockprograms>
<lockmode></lockmode>
<lockcode></lockcode>
- Now restart Kodi. You’ll go straight to the main profile without needing to log in.
- Not your master lock preferences again. Just see the sections above for a detailed guide.
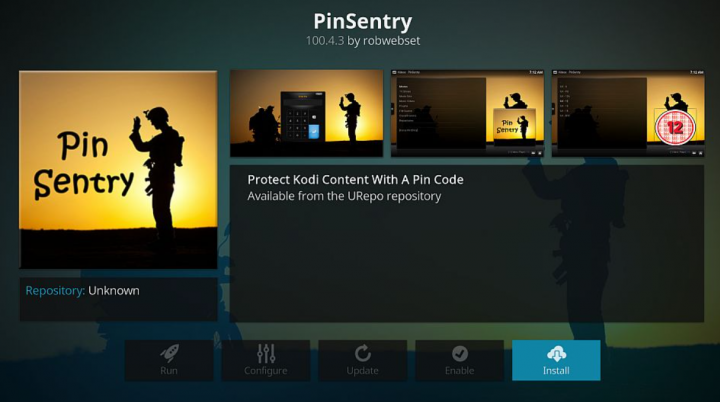
Strong Parental Controls with the PinSentry Add-on
Master lock also lets you seal off categories of content with a single parental password. PinSentry gets even more detailed along with the ability to lock individual folders, videos, plug-ins, add-ons, and much more. It’s so detailed you may not even have to set up a separate profile for your children. Just pick a strong PIN, select what content you want to guard, and that’s it.
In order to install PinSentry you’ll have to add the urepo repository. Just follow the steps below to add it to your version of Kodi, and then continue to install the add-on itself.
How can you install PinSentry: | kodi parental control
- First of all, open Kodi on your device.
- Press the gear icon to enter the System menu.
- Head to File Manager > Add Source
- Now type in the following URL exactly as it appears: https://urepo.org/install
- Just name the new repository “.urepo” for easy access.
- Tap on “OK”.
- Head back to the Kodi main menu.
- Choose “Add-ons”
- Tap the open box icon at the top of the menu bar.
- Select “Install from Zip File”
- Choose “uRepo Repository”
- Just install the file named repo.urepository.zip
- Head back to the Add-ons menu and tap the open box icon again.
- Select “Install from repository”
- Just find and click “uRepo Repository”
- Head to “Video add-ons”
- Now scroll down and click “PinSentry”, then install.
How to use PinSentry:
- Head to Kodi’s main menu.
- Now navigate to Add-ons > My Add-ons > All
- Select PinSentry from the list.
- Tap on the “Configure” icon at the bottom of the screen.
- Now under “Setup”, choose the options you like best. You can also leave each and everything at its default value.
- Tap “Set Pin Value”, choose a numeric PIN, and then re-enter when prompted.
- Tap on the “Activity” tab and set these options as you see fit. Important ones are video playing, plugins, and also repository access.
- Optionally, you can set the configurations under the advanced and time limits tabs. PinSentry also has good default, so you don’t have to worry about this right now.
- Just close the settings window then run PinSentry.
- Navigate the category menu and select each individual piece of content you want to lock with a PIN. A checkmark will appear next to an item if it’s currently protected or not.
- Whenever you’re done, head back to the main menu. All of your selected content will now be protected via the custom PIN.
Conclusion
Alright, That was all Folks! I hope you guys like this “Kodi parental control” article and also find it helpful to you. Give us your feedback on it. Also if you guys have further queries and issues related to this article. Then let us know in the comments section below. We will get back to you shortly.
Have a Great Day!
Also See: Is Auslogics Registry Cleaner Safe to Use – Review


