Do you want to reset your CMOS? If yes, then you are in the right place. The CMOS also called the Complementary Metal-Oxide-Semiconductor. However, it is a small piece of memory used to save your PC BIOS or UEFI configuration. The configuration controls what your PC does on boot. If you’ve crushed your BIOS with a failed overclocking setup or your machine can’t boot properly, moving back the BIOS or UEFI to the factory defaults can certainly set things right. You will also lose any custom BIOS configurations. But those can easily reset. If you have an especially complex setup, you can also recover your working UEFI settings and recover later. You probably don’t have one now, but it’s a good technique for the future.
After you built your own PC, it must be quite easy to reset your CMOS. Pre-built systems probably be a little tough, but you can make one of the techniques below that works for you.
Contents
How To Reset Your CMOS with a Case Button
After viewing a button on your PCs case labelled “Clear” or “Reset,” that will reset the CMOS.
Step 1:
Switch off your PC.
Step 2:
Unplug your PC from the wall outlet. You can disconnect the power from the back of your power supply or from the wall outlet.
Step 3:
Then add the case button marked “Clear” or “Reset.” It’s located next to or near the power button.
Step 4:
Hold the “Clear” or “Reset” button down for 5 – 10 seconds, then release it. You probably want to use the end of a pen to hold down the button if it’s small.
Step 5:
Unplug your PC to power and reboot.
Step 6:
Hit the exact key to input your BIOS options. On most motherboards, this is the “Delete” key, besides for ASRock motherboards that use “F2.”
Step 7:
Then adjust your BIOS options as required. Some motherboards have the choices to load “optimized defaults” which is the best starting point.
How To Reset Your CMOS with a Motherboard Button
Some advanced motherboards have a board-mounted button to reset the CMOS. You can access it after opening the PC case and locating the button within the case. It will typically be marked something like “CLR,” “CLEAR” or “RESET.”
Step 1:
Disable your PC.
Step 2:
Hit the case’s power button various times to discharge any motherboard capacitors.
Step 3:
Unplug your PC from the wall outlet. You can disconnect the power from the back of your power supply or from the wall outlet.
Step 4:
Locate the exact button on your motherboard. If you’re unsure where to find it, then look at the manual of the motherboard.
Step 5:
Hit and hold the button for a few seconds using your finger or the eraser end of a pencil. After using your finger, remember to ground yourself by clicking a bare metal surface before touching anything inside your PC.
Step 6:
Again connect your PC to power and reboot.
Step 7:
Hit the exact key to input your BIOS options. Some motherboards use the “Delete” key but view for your splash screen.
Step 8:
Then resize your BIOS options as required.
How To Reset Your CMOS After Reseating CMOS Battery
If you have no alternative way to reset your CMOS. Then you can remove saved settings after erasing the CMOS battery. This battery enables the volatile CMOS memory to stay powered even when the PC is unplugged from an outlet. After erasing and replacing the battery, you’ll remove the CMOS, forcing a reset.
Step 1:
Switch off your PC.
Step 2:
Hit the power button many times to clear any capacitors.
Step 3:
Unplug your PC from the wall outlet.
Step 4:
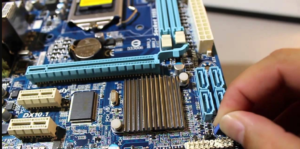
Look for the CMOS battery on your motherboard. This is quite commonly a CR2032 battery, a coin-sized battery. You’ll also find it near the PCI Express slots on some motherboards.
Step 5:
Slowly erase the CMOS battery. If it is prevented by a metal clip, move the battery out from the bottom of the clip. Remember not to bend the clip.
Step 6:
Wait a while, then aside from the CMOS battery.
Step 7:
Reboot your PC.
How To Reset Your CMOS via Motherboard Jumper
After manually adjusting the right jumper, simply trigger the CMOS clearing function.
Step 1:
Switch off your PC.
Step 2:
Hit the power button many times to clear any capacitors.
Step 3:
Unplug your PC from the wall outlet.
Step 4:
Open your PC case and locate the CMOS clearing pins. Typically, it will be a two- or three-pin configuration mounted on the motherboard marked “RESET”, “CLEAR,” or also “CLRPWD” for “clear password.”
Step 6:
In this step, on the three-pin configuration uisng a shared middle pin. Simply move the plastic jumper over to attach the centre pin and the earlier disconnected pin. For a two-pin configuration, erase the jumper fully.
Step 7:
Wait for 3 – 5minutes, then move the jumper to its original configuration.
Step 8:
Reboot your PC.
You can also reset your CMOS using any of the above techniques.
Conclusion:
Here’s all about “Reset Your CMOS”. Whatever the given methods you used, you can easily reset your CMOS. If you want to share any other method or tips regarding the article then let us know below. For further queries and questions let us know in the comment section below!
Also Read:


