If you guys are facing an error message saying ‘We could not complete the install because an update service was shutting down’ whenever updating the Windows. Then don’t worry; you guys are at the perfect place reading the perfect article. The fact is that we have been through the same situation, and we looked around for solutions. We now totally get the situation you are in right now. You can go through the solutions and follow the steps In this article, we are going to talk about We could not complete the install because an update service was shutting down Error. Let’s begin!
Contents
- 1 We could not complete the install because an update service was shutting down Error
- 1.1 Reboot Your Computer
- 1.2 Make Sure Windows Update Service is Running
- 1.3 Run Troubleshooter
- 1.4 Disable Windows Defender Service
- 1.5 Repair Windows Files using DISM
- 1.6 Uninstall Third-Party Antivirus Software | could not complete the install
- 1.7 Fix Corrupted Windows Update Database
- 1.8 Reset Windows 10 | could not complete the install
- 1.9 Conclusion
We could not complete the install because an update service was shutting down Error
Reboot Your Computer
In order to install pending windows updates, most of the time, you guys have to reboot your system. It is the requirement of the system in order to validate the update services of windows.
As for the errors, you guys must have solved a lot of problems just rebooting your computer. Miraculously, it happens to work most of the time as well. Thus, here you just have to reboot your system in order to fix the windows error. Tap on Alt+F4 or straight head to start options to reboot your computer. If that doesn’t work, then we have other ways mentioned in order to help you out.
Make Sure Windows Update Service is Running
Windows services. msc is an MMC (Microsoft Management Console) that is actually meant to keep a check on Windows Services. It permits users permission in order to start or stop running services on the computer. Now just follow along to fix your problem:
- Tap on Windows Key + R to open the Run window and then type services.msc in the box and tap on OK.
- Now, a window Services Snap-will also shows up. Check there for the Windows Update option in the Name section as well.
- The Windows Update service should be set to automatic, however, if it is set to Manual in the Startup Type, double-tap on it. Now, head to the Startup Type dropdown menu and then change it to Automatic and click on Enter.
- Tap on Apply followed by the OK button. As for the final step, then try again to reinstall the system updates that are pending.
This method has also worked for many and must work for you too. Mostly, the given problem is due to Updates being set to manual. Since you guys have turned it back to automatic, then your problem should get solved as well.
Run Troubleshooter
If the reboot does not really work, then the next best option is troubleshooting. You can just fix your error via using windows troubleshoot through following the steps:
- Tap on Windows Key +I in order to open Settings then tap on Update &security options.
- On the left, you’ll guys find the Troubleshoot option. Tap on it.
- There, you have to click on the Additional troubleshooters.
- Now, in this additional troubleshooting section, tap on the Windows Update option.
- Then and in the last step, choose the Run the troubleshooter option.
That’s just it. You only have to follow the above steps, and windows will then automatically repair the system and fix the error. Windows Troubleshoot feature is actually meant to solve such irregular errors.
Disable Windows Defender Service
You guys can also fix the ‘We could not complete the install because an update service was shutting down’ error via disabling the Windows Defender Service from the Services window as well. Here is how you guys can do it:
- Tap on Windows Key + R in order to open the Run window then type services.msc and click on the Enter button or click OK.
- Now, in the Services window, just search for the Windows Defender Service in the Name column.
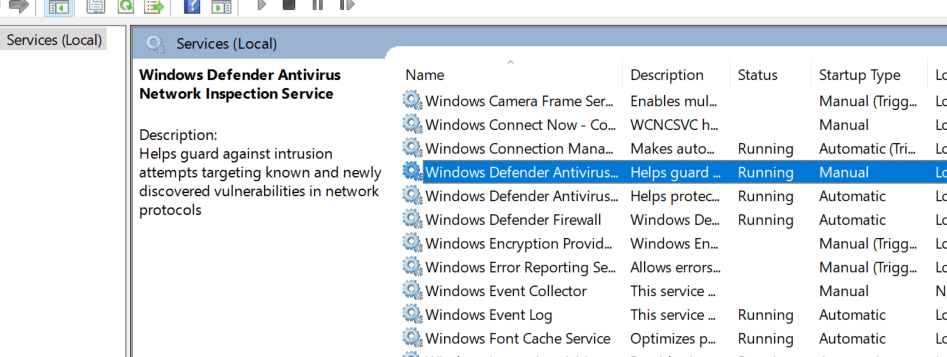
- If it is not set to Disabled the Startup Type column, then just double-click on it.
- Now from the Startup Type dropdown menu, choose Disabled, and click on Enter.
Repair Windows Files using DISM
You guys can try to fix the Windows corrupted files first. You will have the DISM as well as System File Checker Tool. Just don’t worry about the jargon here. Just follow the steps in order to fix this issue and update your system:
- Now search for Command Prompt in the Windows search bar, then right-click on the search result, and choose Run As Administrator.
You guys will receive a User Account Control pop-up requesting your permission in order to allow Command Prompt to make changes to your system. Tap on Yes to give permission.
- When the Command Prompt window opens up, then carefully type the following command and click on enter to execute.
sfc /scannow
- The scanning process will now take some time so sit back and then let the Command Prompt do its thing. If the scan didn’t find any corrupt system files, then you guys will see the following text:
Windows Resource Protection did not find any integrity violations.
- Just execute the below command (to repair Windows 10 image) if your PC continues to run slow even after running an SFC scan too.
DISM /Online /Cleanup-Image /RestoreHealth
Now just reboot your system to check if the error is fixed or not. Your problem must also have been solved via now. However, in case you are still struggling, we also have one last trick up our sleeve too.
Uninstall Third-Party Antivirus Software | could not complete the install
Many times these third-party antivirus applications also block your system from installing the updates. They just disable the service of installing the updates on your system due to the potential threat they sense. Just like it seems completely senseless, you guys can fix the error via uninstalling these third-party applications from your system. You have to follow the given steps in order to uninstall the third-party apps:
- First of all, search for the Control Panel in Windows Search and then open it.
- Now under the Programs section in Control Panel, head to the ‘Uninstall a program’ option.
- Then another window will pop up. Now search for the third-party application you guys need to uninstall.
- Now right-tap on it and choose Uninstall.
After uninstalling the third-party apps, then reboot your device. This will apply the changes that occurred after the uninstalls as wel. Now try in order to update your Windows again. If it worked and you guys have installed the pending updates, then you can reinstall the antivirus.
Fix Corrupted Windows Update Database
Maybe your Windows Update Database has actually got corrupted or damaged. Thus, it will not permit installing any updates on the system. There you may have to fix the Windows Update Database. In order to fix this problem, go through the given list of steps correctly:
- First, open Command Prompt with administrative rights.
- Now type the following commands to stop Windows Update Services and then click on Enter after each one:
1. net stop wuauserv
2. net stop cryptSvc
3. net stop bits
4. net stop msiserver
- Next, type the following command in order to rename SoftwareDistribution Folder and then click on Enter:
ren C:\Windows\SoftwareDistribution SoftwareDistribution.old
ren C:\Windows\System32\catroot2 catroot2.old
- At last, then type the following command in order to start Windows Update Services and then click on Enter after each one:
1. net start wuauserv
2. net start cryptSvc
3. net start bits
4. net start msiserver
When you have completed these steps, Windows 10 will automatically then create a folder and download the necessary elements for running Windows Update services as well.
Reset Windows 10 | could not complete the install
Note: If you can’t access your PC then restart your PC a few times until you guys start Automatic Repair as well as use this guide to access Advanced Startup options. Then just navigate to Troubleshoot > Reset this PC > Remove everything.
- Tap on Windows Key + I in order to open Settings and then click on the Update & Security icon.
- From the left-hand menu just choose Recovery.
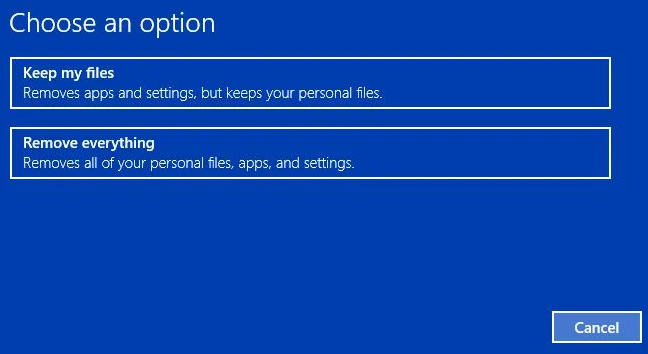
- Now under Reset, this PC then tap on the “Get Started” button.
- Choose the option in order to keep my files.
- For the next step you guys might be asked to insert Windows 10 installation media, so make sure you have it ready.
- Now, choose your version of Windows and then tap on only the drive where Windows is installed > Just remove my files.
- Click on the Reset button.
- You have to follow the instructions on the screen to complete the reset.
If nothing works then you guys can directly download the Windows 10 ISO using the Media Creation Tool. Once you have downloaded the ISO then right-click on the ISO file and select the Mount option. Next, just navigate to the mounted ISO and double-click on the setup.exe file to start the in-place upgrade process.
Conclusion
Alright, That was all Folks! I hope you guys like this “could not complete the install” article and also find it helpful to you. Give us your feedback on it. Also if you guys have further queries and issues related to this article. Then let us know in the comments section below. We will get back to you shortly.
Have a Great Day!
Also See: How to Fix NVIDIA Display Settings Are Not Available


