Do you want to add checkboxes in Excel 2010? Checkbox insertion in Excel sounds like a difficult task. But do you know that using these checkboxes; will make your work simpler with worksheets. However, it’ll help you in keeping a record of your schedules, goals, assignments, etc. in an efficient manner.
Checkboxes and many other controls like dropdowns, look very impressive in Excel and can be very essential while designing forms in MS Excel. However, these controlling options prevent users from adding irrelevant data to your forms, and hence they are preferred to older text boxes.
In this guide, you’ll learn how to add checkboxes in Excel 2010 and utilizes the checkbox results in formulas to create a checklist, to-do list, graph, or report.
Also See: How to Shade every other Row in Microsoft Excel
How To Add Checkboxes In Excel 2010
Here you’ll learn the complete steps to add checkboxes in Excel 2010 worksheet. Similar to any other Excel form controls, checkbox control exists on the Developer tab. However, the tab won’t appear on the Excel ribbon anywhere. So initially you’ve to enable this.
Enable Developer Tab On Ribbon
Follow the steps to add the Developer Tab into the Excel Ribbon.
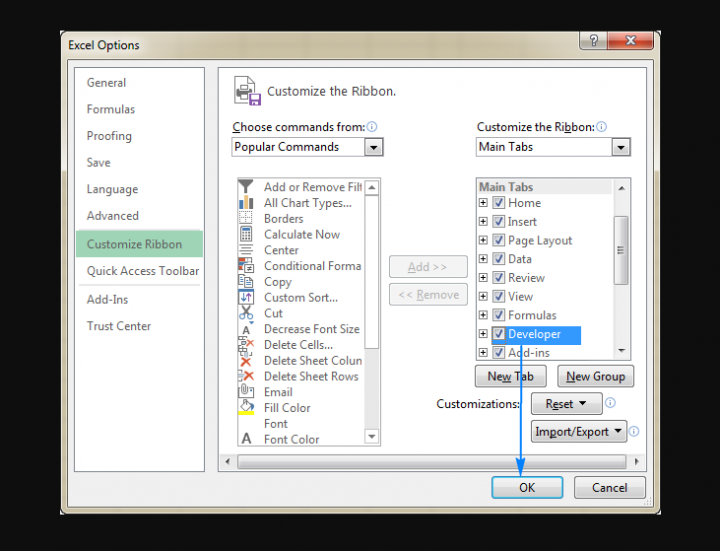
- Right-tap anywhere over the ribbon. After then click to Customize the Ribbon option… Or, you can move to the File > Options >Customize Ribbon.
- Now from the Customize the Ribbon tab, choose the Main Tabs (by default it is selected). Then mark over the Developer box, and press the OK option.
After you enable the Developer tab within your Excel ribbon. You can easily access some interactive controls like CheckBox.
Organize Data To Add Checkboxes In Excel 2010
After making an excel checklist, initially make a list of tasks or items for which you are adding the checkboxes.
For example, you have just created a checklist for party planning.
Add Checkboxes In Excel 2010
Now all your preparation time is over so let’s head over to our important part i.e adding or inserting checkboxes to the above create party planning list:
Follow the steps to add checkboxes in Excel 2010:
- Head over to the Developer tab> Controls group. Click to the Insert option and select the CheckBox under Form Controls.
- Click to the cell in which you like to add your first checkbox. You’ll then view a Checkbox control will present near it, not exactly in that cell.
- If you wish to keep the checkboxes in the exact position, put your mouse cursor over it. When the cursor gets changed to a four-pointed arrow shape, simply drag down the checkbox wherever you want to keep it.
- For erasing off the text “Check Box 1” from the checkbox. Right-tap over the checkbox. Just choose the text and remove it.
Or, you’ll have to right-tap on the checkbox, click on the Edit Text option, and after then delete the text. If you know any other way to add checkboxes in Excel 2010 then let us know below!
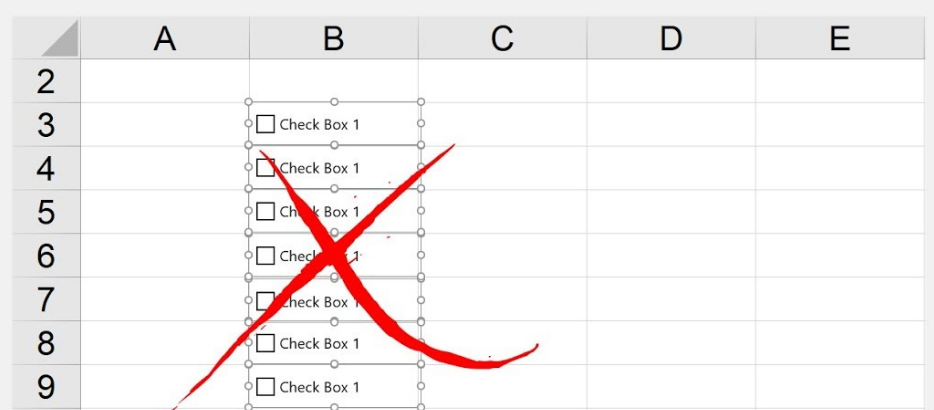
Your first checkbox is ready now, so you just need to copy it down to other cells.
Also See: How to convert Numbers files to Excel on Mac
Copy The Checkbox To Other Cells
If you want to add checkboxes in Excel 2010 then copy them to other cells. Select cells having the checkboxes using the keyboard arrow keys and put the pointer over the lower right corner of the cell. When the mouse cursor changes to a thick black cross shape you can then drag it to the place wherever you like to copy the checkbox.
Now all your checkboxes are well added to all items present in the checklist.
Maybe you think that the Excel checklist is now ready to get used but actually, it’s not. You can mark or unmark after tapping on the box. But Excel not respond to these changes as they are not linked to any checkboxes yet.
So come let’s check how to link a checkbox to a cell.
Link Checkboxes To Create An Interactive Checklist
Well, in this section you can make an interactive checklist in Excel simply by linking your checkbox to the cell. So, let’s check how to do that in Excel.
As we said earlier if you want to capture the checkbox state (checked or unchecked) you want to link the checkbox with a certain cell. To do this, please follow these instructions:
- Right-tap over the checkbox. After then click on the Format Control option.
- Now head over to the opened Format Control dialog box. Then make a switch to the Control tab. Click to the cell link box and select the blank cell over the sheet of which you want to link to the checkbox. Or else just input the cell reference manually.
- In the same way, repeat the same procedure for the remaining checkboxes.
Note: For easy identification of your linked cells, just choose them in an adjacent column that is blank. In this way, you can easily hide the linked cells, so it won’t do any sort of mess up in your worksheet. If you know any other way to add checkboxes in Excel 2010 then let us know below!
- Click on each link of linked checkboxes. Well, in linked cells, you will then view TRUE appear for the selected checkboxes and false for cleared checkboxes.
Also See: How to Add Header and Footer in Microsoft Excel
How To Remove A Checkbox In Excel
You can also remove a checkbox by using these two ways.
Way 1:
- Choose a checkbox and hit delete. This one is a quick method to do that.
- And if you have many checkboxes in your worksheet then choose all the checkboxes by holding the control key.
- And hit deletes to remove them all.
Way 2:
- You can use the selection pane to remove them.
- Head over to home tab→ Editing → Find & Select → Selection Pane.
- From the selection pane, you will get a list of all the checkboxes that you have used in your worksheet.
- You can also choose each of them one by one, or you can choose more than one by one using the control key. After you choose them, hit delete.
Conclusion:
I hope after reading the tutorial, you can understand how to add checkboxes in Excel 2010 and create an interactive checklist, to-do list and report easily.
Well, if your Excel workbook starts showing errors or gets corrupted then run the Excel Repair Tool. It will help you to repair damaged, corrupt, Excel files and also recover all your Excel file data easily.
If you want to ask any queries or questions then please share them with us, by moving to the comment section.
Also Read:


