The Windows 10 Minecraft version supports skins and texture packs like its Java counterpart. Modding the look of Minecraft is something users love to do and there are texture packs. That can dramatically change how the game looks. Here is how you can install skins and texture packs on Minecraft Windows 10 UWP. In this article, I am going to show you How to Install Minecraft Windows 10 Texture Packs. Let’s begin!
Contents
Minecraft Windows 10 Texture Packs Compatible Packs & Skins
Well, before you install skins and texture packs on Minecraft Windows 10 UWP. It is important to know that the packs for the Java version are not compatible with the UWP version. Unfortunately, this means a good portion of some of the best, free packs cannot be used with the UWP application. It is yet another reason that more users stick to the Java version.
In order, to find compatible packs, check the usual repositories and read their descriptions. If a pack states that it will work on the Windows 10 version. You can also download it and try to install it. Skins are just PNG files. So you will not have any trouble finding them for the Windows 10 version.
Minecraft Windows 10 Game Folder
Assuming you have found a texture pack that is compatible with the Windows 10 version. Here is how you can install it. The pack most likely came as a zipped file. Extract it to your desktop.
Next, open the following location in File Explorer.
C:\Users\Your User Name\AppData\Local\Packages\Microsoft.MinecraftUWP_8wekyb3d8bbwe\LocalState\games\com.mojang
Texture Packs | Minecraft windows 10 texture
The texture pack that you have extracted actually goes into the folder named ‘Resource_packs’. It is one of the folders present in the above location. Paste the extracted folder here and Minecraft will be able to access it.
Then, you need to enable the texture pack. Open Minecraft and click Settings. Scroll down the left column, and click on Global Resources. Here, you will see a list of active, and available texture packs and it should include the one you moved to the resource_packs folder.
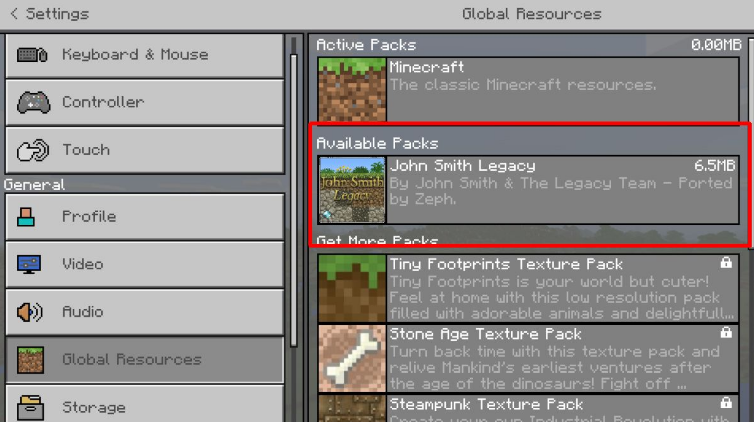
Select it, and click the Plus button to enable it. At any given time, you can have more than one texture pack enabled.
If a texture pack does not appear, it is most likely incompatible with this version of Minecraft.
Skins | Minecraft windows 10 texture
Find and download the skin for Minecraft. It is going to download as a single PNG file. In some cases, there may be more than one PNG file and each file will be a different variation of the same skin. Such as different colors of the same skin.
You can also save the PNG file anywhere but it is a good idea to place it somewhere it won’t accidentally be deleted.
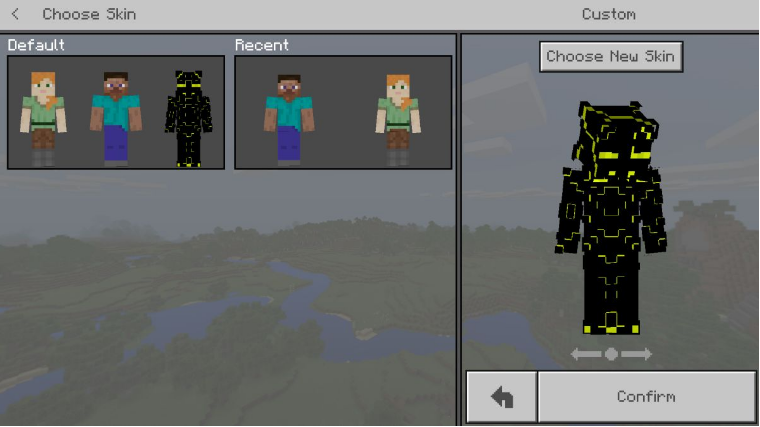
Open Minecraft and click the little wire hanger icon under your avatar on the start screen. This will take you to customize the skin screen. In the Default box, click the avatar outline, and click the ‘Choose New Skin’ button in the Custom box.
Select the PNG file you downloaded, and then the skin will be applied.
Conclusion
Alright, That was all Folks! I hope you like this Minecraft windows 10 texture article and find it helpful to you. Give us your feedback on it. Also if you still have further queries and issues related to this article. Then let us know in the comments section below. We will get back to you shortly.
Have a Great Day!
Also See: How to Resolve Windows 10 Corrupted Recycle Bin Message


