Do you want to remove Windows.old folder on Windows 10? After you upgrade your PC to the latest model of Windows 10, or you can install a preview build, then the installation process stores a copy of the earlier model in the “Windows.old” folder.
It is for safety mechanism when the upgrade process went wrong. When the installation fails for whatever reason, the PC can use the Windows.old folder to undo the modification. Also, when the upgrade successfully completes, the backup copy of the earlier model will be kept to provide the choice to rollback in case the new installation is causing problems.
Well, this is a handy feature, if your PC is working properly after the upgrade, you can securely remove the Windows.old folder to reclaim the space gigabytes.
In this Windows 10 article, we’ll move you through many alternative methods ways that you can get rid of the Windows.old folder to make a space of many gigabytes to save many important files.
Contents
How To Remove Windows.old folder via Storage Sense Settings

The simplest technique is to remove the Windows.old folder from your device is to use the Storage sense using these instructions:
Step 1:
Head over to Settings.
Step 2:
Then tap on System.
Step 3:
Tap on Storage.
Step 4:
At the bottom of the “Storage sense” section, tap the Change how we free up space automatically option.
Step 5:
At the bottom of the “Free up space now” section, look at the Delete previous version of the Windows option.
Step 6:
Then tap the Clean now button.
How To Remove Windows.old Folder Via Temporary Files Settings

On the other hand, simply use the Settings app, you can remove the Windows.old folder using the Temporary files settings with these instructions:
Step 1:
Head over to the Settings.
Step 2:
Tap on System.
Step 3:
Tap on Storage.
Step 4:
At the bottom of the “Storage sense” section, tap the Free up space now option.
Step 5:
Then check the Previous Windows installation(s) option.
Step 6:
(Mandatory) Wipe the default selected options if you wish to erase the Windows.old folder to make storage.
Step 7:
Tap the Remove files button.
Once done, the folder with the earlier installation of Windows 10 will be erased freeing up 14GB to 20GB of space on your primary hard drive.
How To Remove Windows.old folder via Disk Cleanup
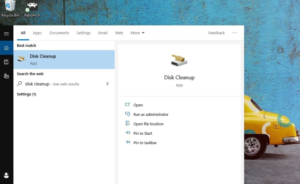
You can also remove the Windows.old folder using legacy Disk Cleanup tool with these instructions:
Step 1:
Head over to File Explorer.
Step 2:
Tap on This PC from the left pane.
Step 3:
At the bottom of the “Devices and drives” section, right-tap the drive with the Windows 10 installation (usually the C drive) and choose the Properties option.
Step 4:
In the “General” tab, tap the Disk Cleanup button.
Step 5:
Tap the Cleanup system files button.
Step 6:
View the Previous Windows installation(s) option.
Step 7:
(Mandatory) Wipe the default selected choices if you only like to erase the Windows.old folder to make storage.
Important: Initiating with the October 2018 Update, Windows 10 is deploring Disk Cleanup in favor of Storage sense. But also it adds a choice to remove all the contents from the Downloads folder. After using this option, and you have the necessary files in the Downloads folder, remember to wipe this option.
Step 8:
Tap the OK button.
Step 9:
Tap the Delete Files button to confirm the deletion.
Step 10:
Tap the Yes button to confirm the warning.
After you’ve completed the steps, the Windows.old folder will be erased from your device.
Conclusion:
Well, it’s safe to remove the Windows.old folder, if you erase its contents, you’ll can’t be able to use the recovery options to roll back to the earlier model of Windows 10. If you remove the folder, and then you want to rollback, you’ll want to perform a clean installation with the required model.
For further queries and questions let us know in the comment section below!
Also Read:


