It must be a point of pride in Redmond that even after all these years, you still have to tap “Start” to shut down your computer. In this article, we are going to talk about Windows 10 Sleep Shortcut You Should Know. Let’s begin!
Granted, the Start button is no longer labeled that way, having evolved into a Windows-logo button back in Vista actually. However, that is still what it’s called, and still how Microsoft refers to it. So even in Windows 10, you have to tap “Start” in order to shut down your PC. Then you click Power and then finally Shut Down.
I’ll never understand why Microsoft has steadfastly refused to add a one-tap ShutDown button to the desktop. Fortunately, there are also faster ways to turn off your computer.
Contents
Windows 10 Sleep Shortcut
1: Use the Power User Menu Shortcut
The most reliable Windows 10 sleep shortcut is not a true keyboard shortcut—instead, it is a quick sequence of keys. But, because it works without any setup, and when using any app, then it is the best method in most cases.
Press Win + X in order to open the Power User Menu. You will also notice underlined characters corresponding to shortcut keys for those actions. Press U, then use one of the following keys to shut down, sleep, or also perform other power actions:
- Tap U again to shut down Windows.
- Click the R key to restart.
- Click S to put Windows to sleep.
- Then use H to hibernate.
- Click I to sign out.
2: Alt + F4 Sleep Mode Shortcut
As you might know, that tapping Alt + F4 closes the current window, just like tapping the X in the top-right corner. But, if you do not have a window currently selected, then you can use Alt + F4 as a shortcut for sleep in Windows 10.
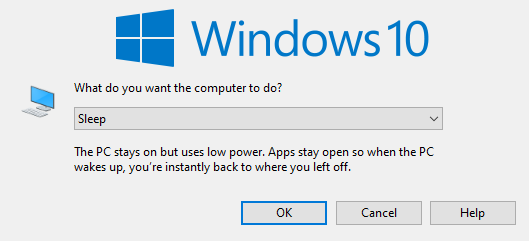
In order to make sure that you don’t have any apps in focus, tap Win + D to show your desktop. From there, tap Alt + F4 and you will open the ShutDown Windows dialog box.
Depending on your system, that you will likely see Shut down or Sleep in the dropdown box by default. If you are happy with this, just click Enter to confirm the selection. Otherwise, use the arrow keys to switch to other options, then tap Enter when you are ready.
3: Creating Your Shortcut to Sleep Windows 10
While there is no built-in sleep shortcut for Windows 10, however, you can make your own keyboard shortcut pretty easily.
Create a New Shortcut
If you want to do this, then start by right-clicking an empty spot on your desktop and choosing New > Shortcut.
In the resulting box, you will need to enter different text depending on if you want a sleep shortcut key or one to shut down the computer. You just have to use the following:
- To shut down Windows immediately and also force-close any open programs:
- shutdown.exe -s -t 00 -f
- In order to create a sleep shortcut:
- rundll32.exe powrprof.dll,SetSuspendState 0,1,0
Unfortunately, there’s a small caveat along with the sleep shortcut. If you have hibernation enabled on your computer, then this command will cause the computer to sleep rather than hibernating.
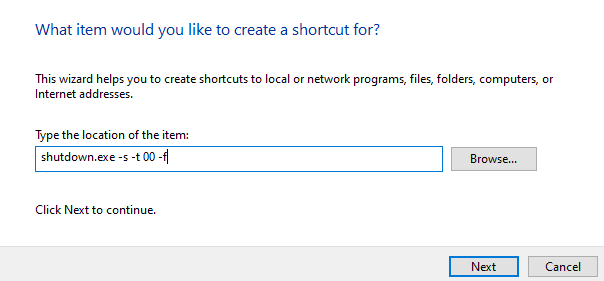
After you enter the command, then type Next, give the shortcut a name, and tap Finish.
Assign a Keyboard Shortcut to the Command
Now that you have a shortcut to the option you want, you just need to assign it a key combination as well. In order to do this, right-click your new shortcut on the desktop and select Properties. Choose the Shortcut tab at the top and in the Shortcut key, then enter a combination that you’d like.
You have to pick something that’s not already in use by other programs. In addition, make sure the shortcut combination you set is not easy to hit by accident, because you won’t want to suddenly shut down your system in the middle of working.
When you do that, tap OK and your Windows sleep keyboard shortcut or shutdown shortcut will be active. If you ever decide that you do not want it, just delete the shortcut file.
Sleep or Shut Down With Ease
Now you know many sleep mode shortcuts to easily shut down or put Windows to sleep. This makes it easy to access power options without even fiddling around in menus.
Conclusion
Alright, That was all Folks! I hope you guys like this sim not provisioned article and also find it helpful to you. Give us your feedback on it. Also if you guys have further queries and issues related to this article. Then let us know in the comments section below. We will get back to you shortly.
Have a Great Day!