What do you know about Telnet installation in Windows 10? Telnet is a network protocol that gives a command-line interface to interact with a device. Telnet is commonly used for remote management but also certainly for the initial setup for some devices. Especially network hardware like access points or switches. Telnet is also used to organize or manage files on a website.
Contents
Working Of Telnet
Originally Telnet was used on terminals. These PCs need a keyboard as everything on the screen displays a message. The terminal provides a way to log on to other devices, just as if you were sitting in front of it and using it like any other PC.
Recently, Telnet can also be used from a virtual terminal, or a terminal emulator, which is essentially an advanced PC that interacts with the same Telnet protocol. However, telnet command is available on the Command Prompt in Windows. It uses the Telnet protocol to interact with a remote device or system.
Telnet commands can also be run on other operating systems (OS) like macOS or Linux, in a similar way that telnet commands are run in Windows.
Telnet is not like other TCP/IP protocols like HTTP, which moves files to and from a server.
Telnet In Windows
Well, Telnet isn’t a protective way to integrate with another device. But there is some reason to use it, but you can’t just head over to a Command Prompt window and want to begin executing telnet commands.
Telnet Client, the command-line tool that runs telnet commands in Windows, works in every model of Windows, but, depends on the Windows version you’re using, you might have to activate it first.
Method 1 – Using Control Panel
Step 1:
Head over to “Control Panel“.
Step 2:
Then open “Programs“.
Step 3:
Choose the “Turn Windows features on or off ” option.
Step 4:
Check the “Telnet Client” box.
Step 5:
Tap “OK“. A box will appear saying “Windows features” and “Searching for required files“.Once complete, the Telnet client should easily be installed in Windows.
Method 2 – Using Command Line
You can also install the Telnet Client after issuing a command.
Step 1:
Initially hold the Windows Key, then hit “R“.
Step 2:
A ‘run’ dialog box appears. Input:
- pkgmgr /iu:”TelnetClient”
Step 3:
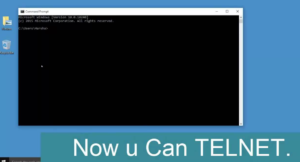
Choose “OK” and Windows will install the Telnet client.
Conclusion:
Here’s all about “Telnet installation in Windows 10”. If you are facing any issue then let us know. If you think that it is helpful then do let us know your suggestions in the comment section below. Have you found any other method that you think we can’t cover in this article? Feel free and let us know below!
Also Read:


